Settings & Configuration
This guide covers all the settings and configuration options available in BOOKIN, including account settings, business profile, security, notifications, and team management.
Accessing Settings
Section titled “Accessing Settings”To access your settings:
- Log in to your BOOKIN dashboard
- Click on “Settings” in the navigation menu
- You’ll see different setting categories to choose from
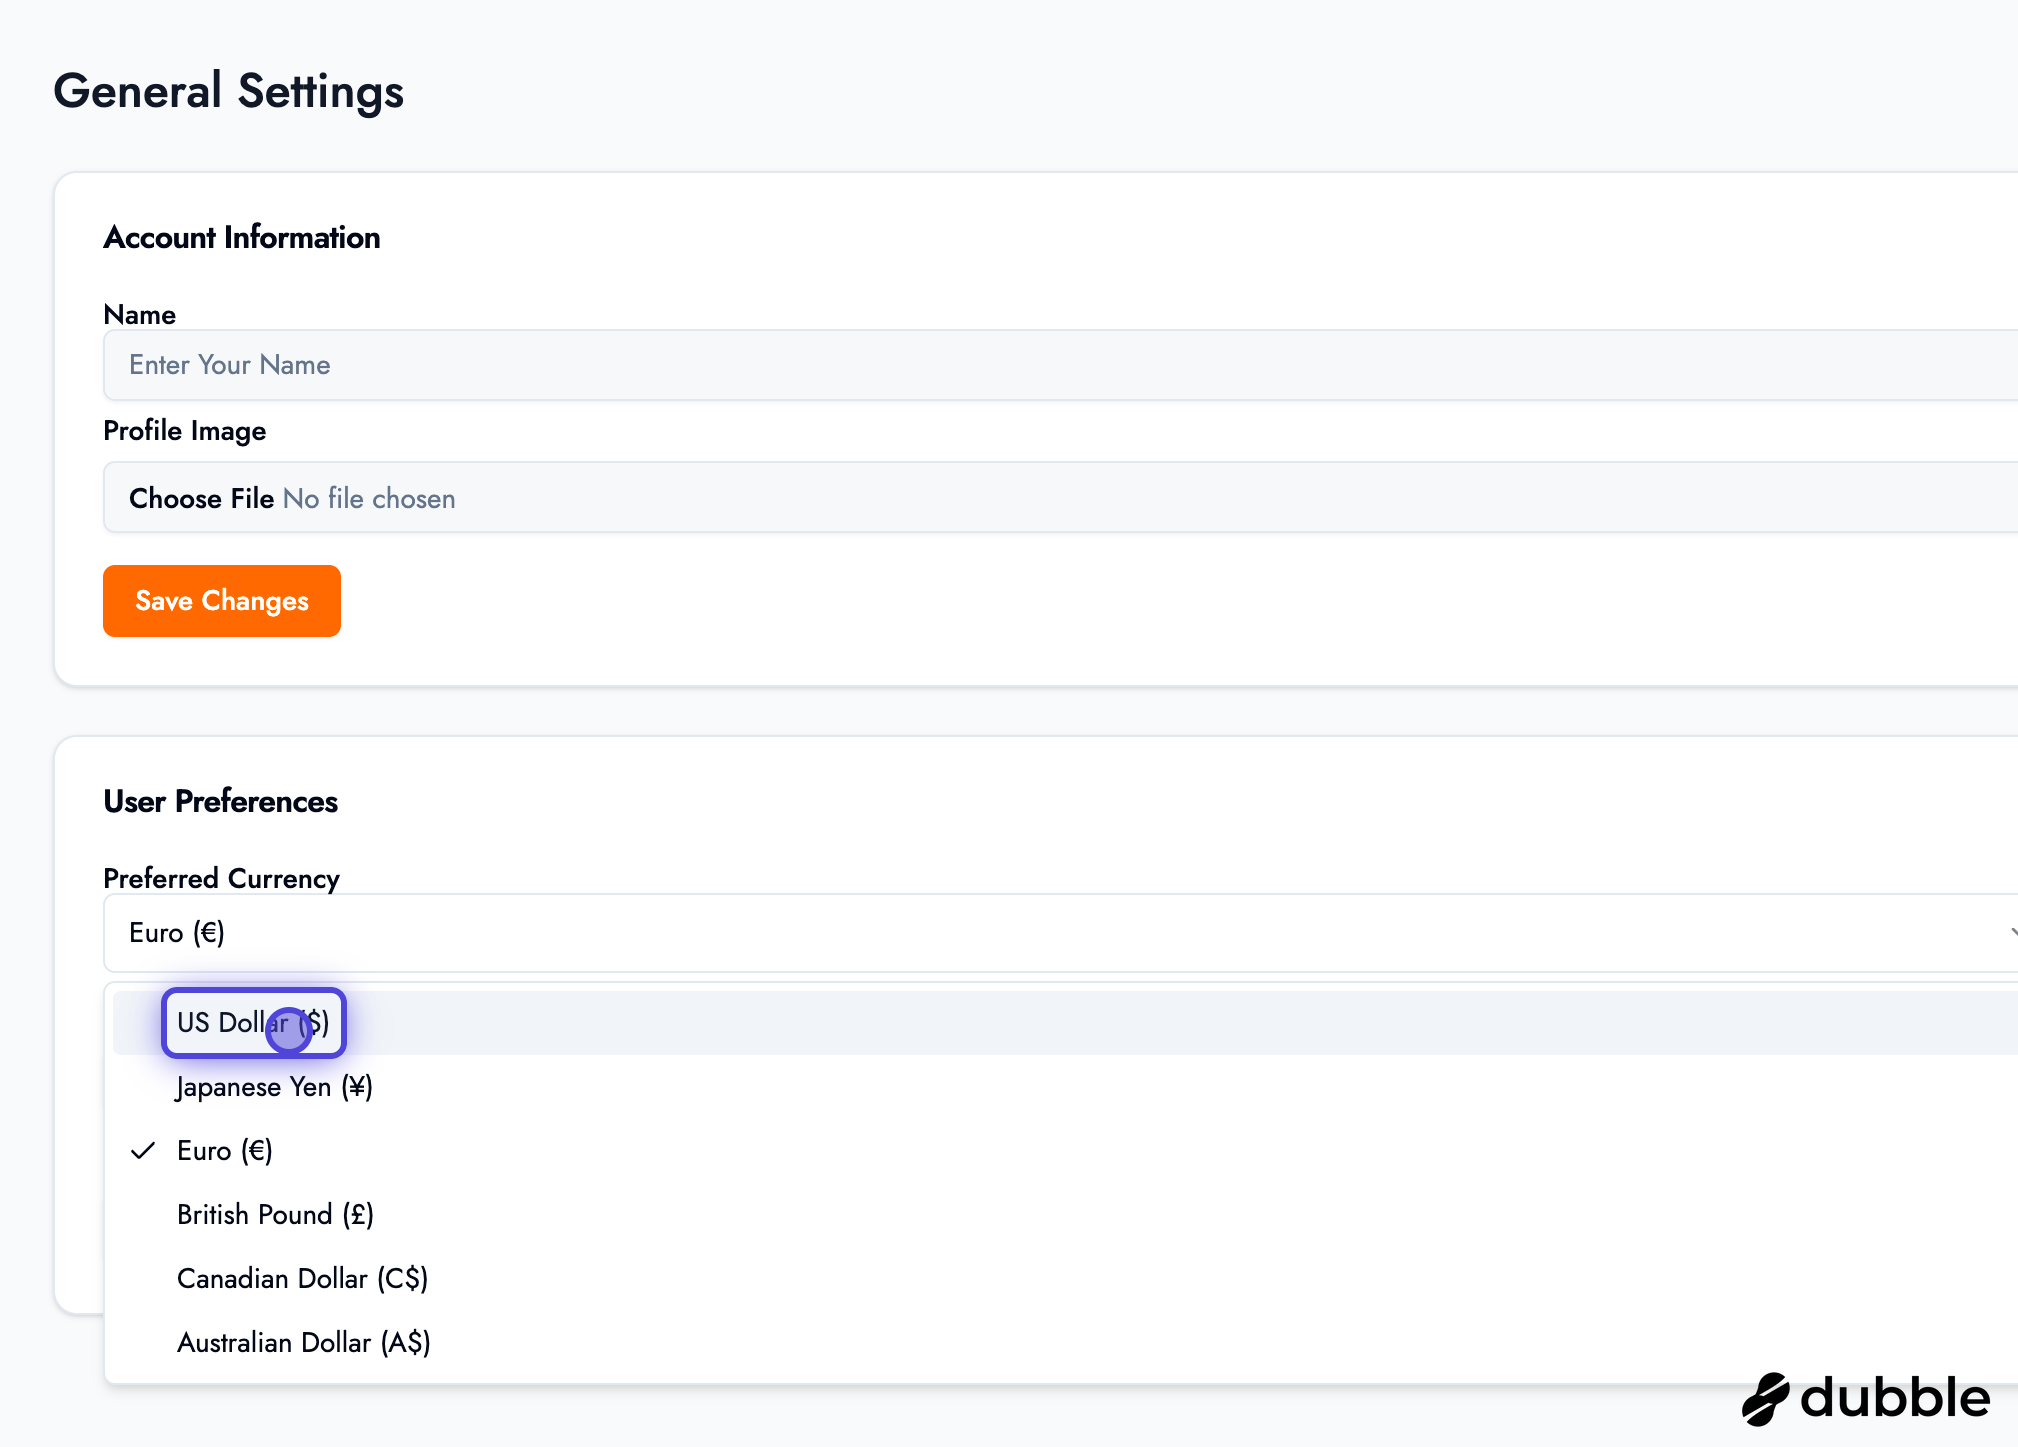
General Settings
Section titled “General Settings”Configure your personal account preferences and profile information.

Account Information
Section titled “Account Information”- User Account Name: Update your display name
- Profile Picture: Upload or change your profile picture
- Email: View and manage your email address
- Language: Set your preferred language
- Currency: Choose your preferred currency for pricing
Profile Management
Section titled “Profile Management”Keep your profile information up to date:
- Update your name as it appears in the system
- Upload a professional profile picture
- Set language and currency preferences for your region
Business Settings
Section titled “Business Settings”Configure your business profile, branding, and public-facing information.
Business Profile (Upper Section)
Section titled “Business Profile (Upper Section)”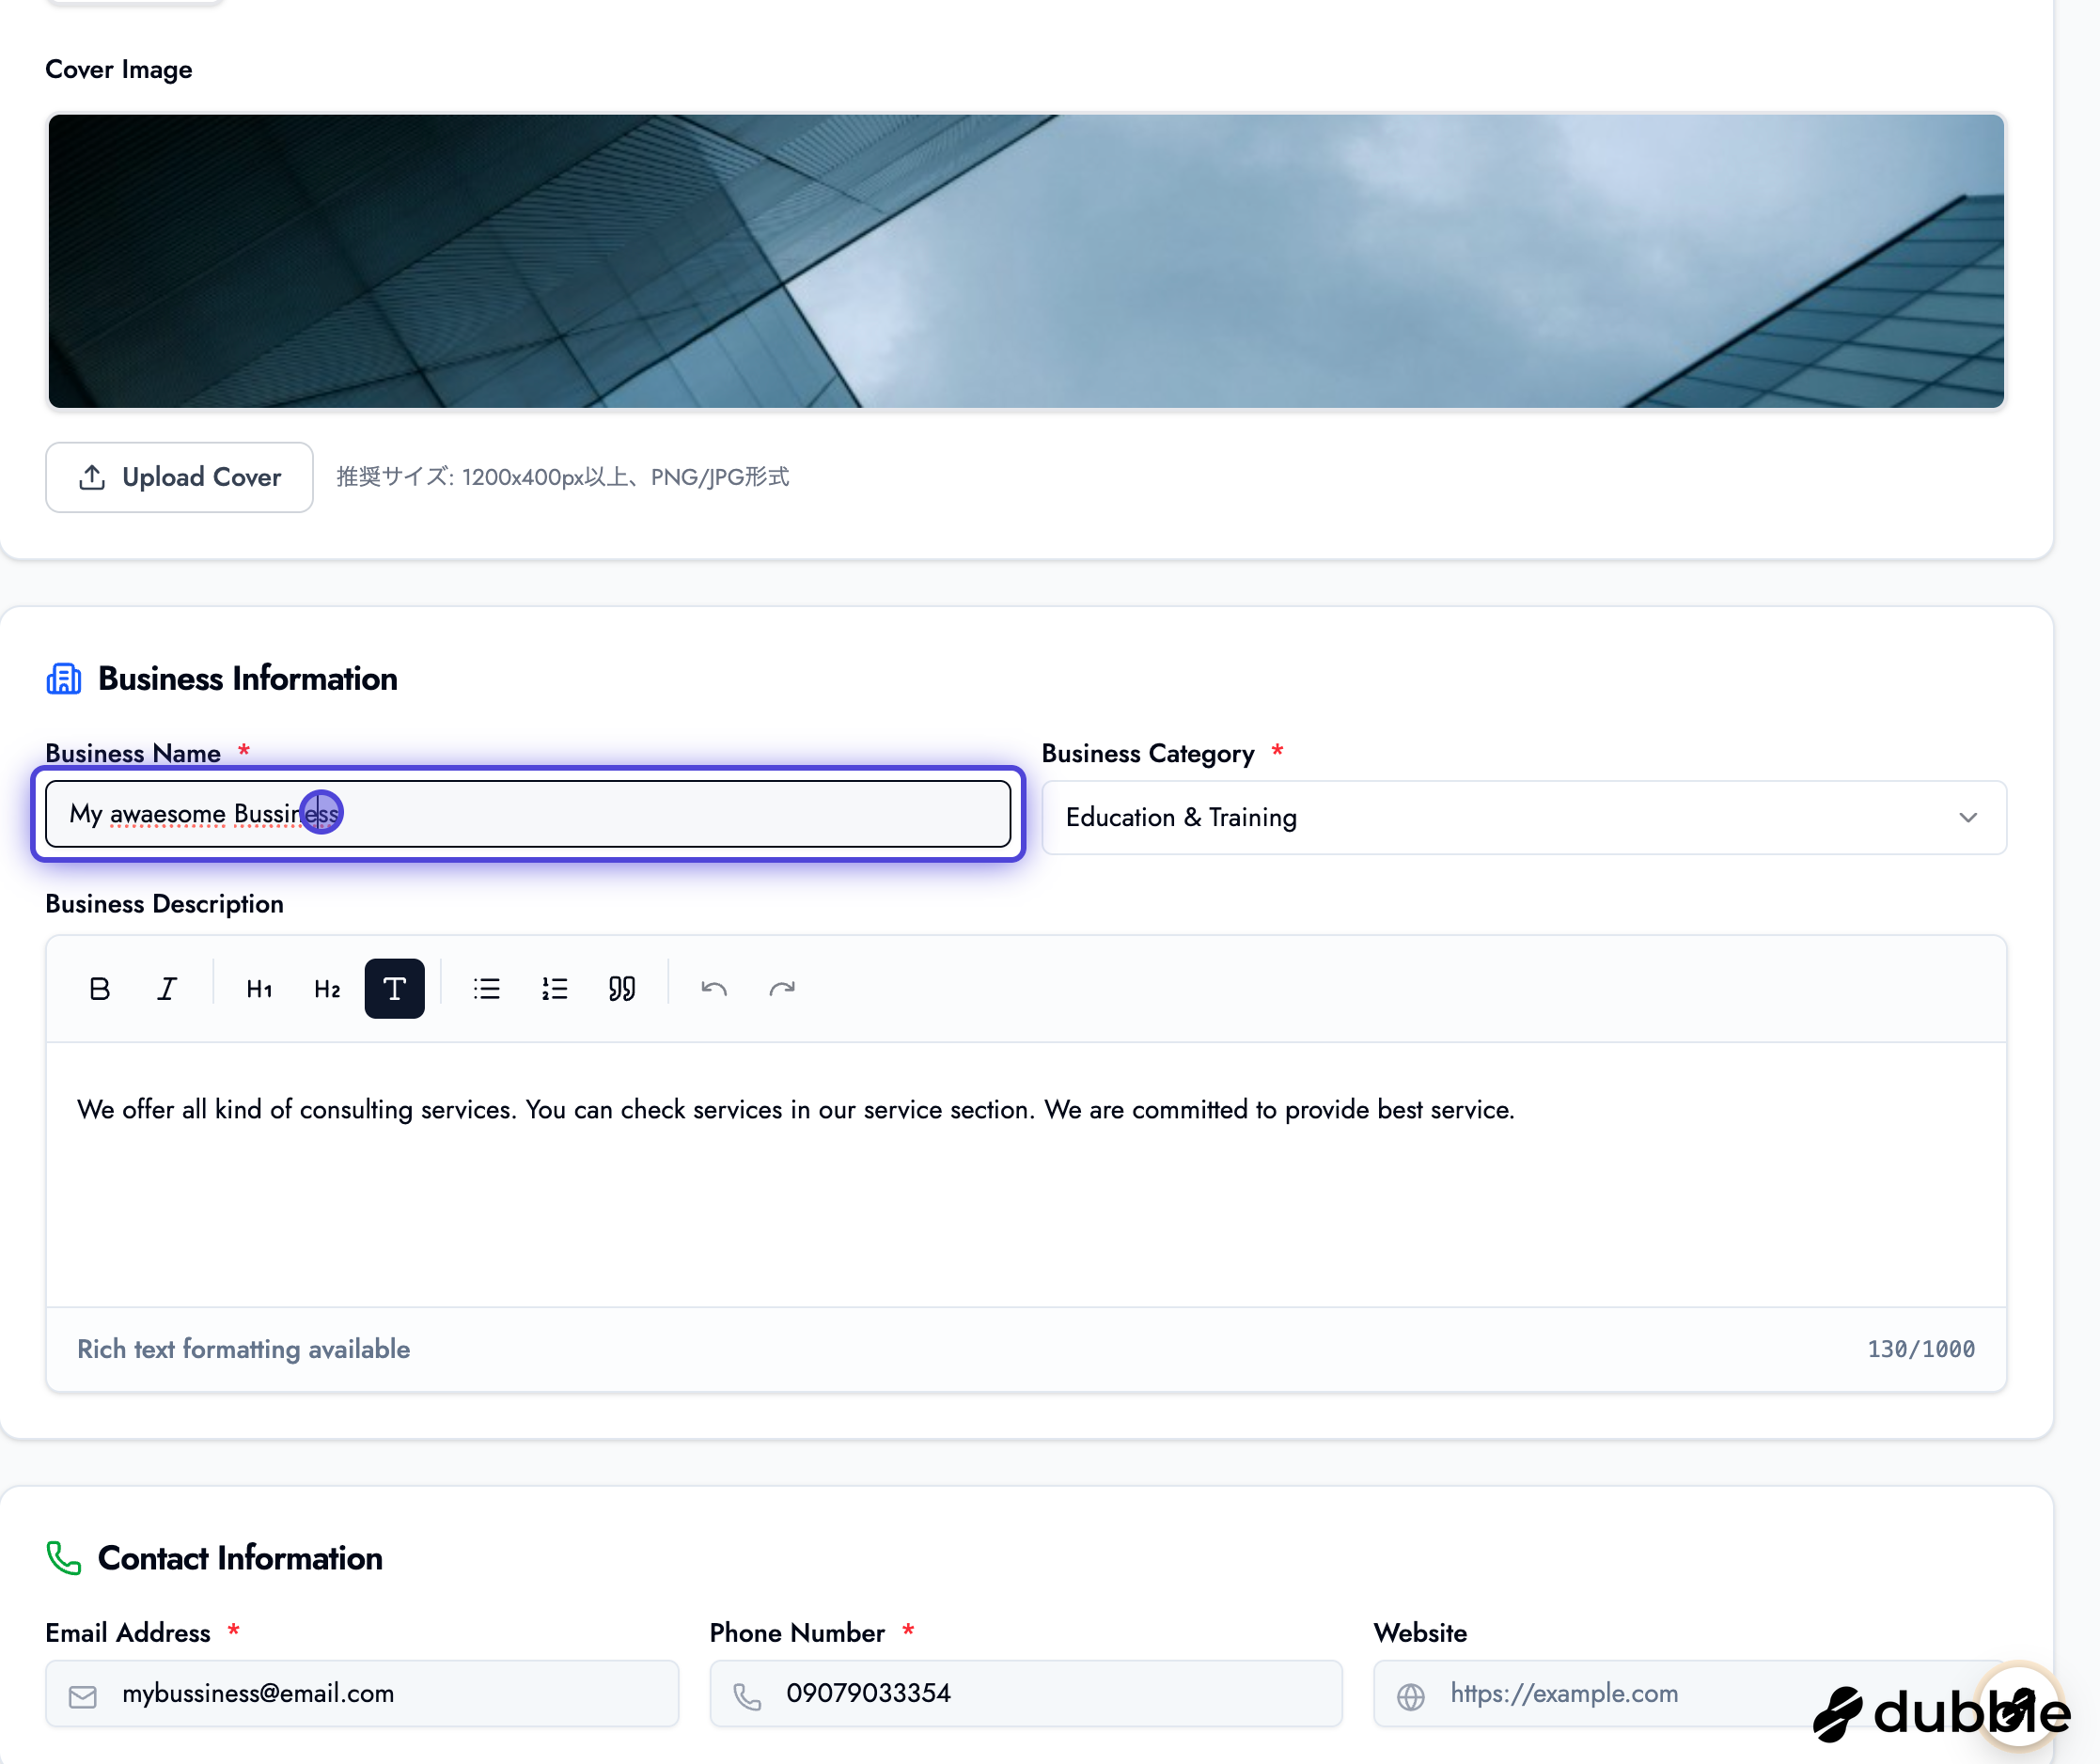
Branding (Optional):
- Business Logo: Upload your business logo
- Cover Image: Add a cover image displayed on your public booking page
- These are optional but recommended for professional appearance
Business Details:
- Business Name: Your business name as it appears to customers
- Category: Select your business category
- Description: Use rich text editor to create a detailed business description
- This description appears on your public booking page
- Include what makes your business unique
- Add formatting, links, and images
Contact Information:
- Address: Your business address
- Phone Number: Contact phone number
- Email: Business email address
- Website: Your business website URL
- Social Media: Links to your social media profiles
Business Settings (Lower Section)
Section titled “Business Settings (Lower Section)”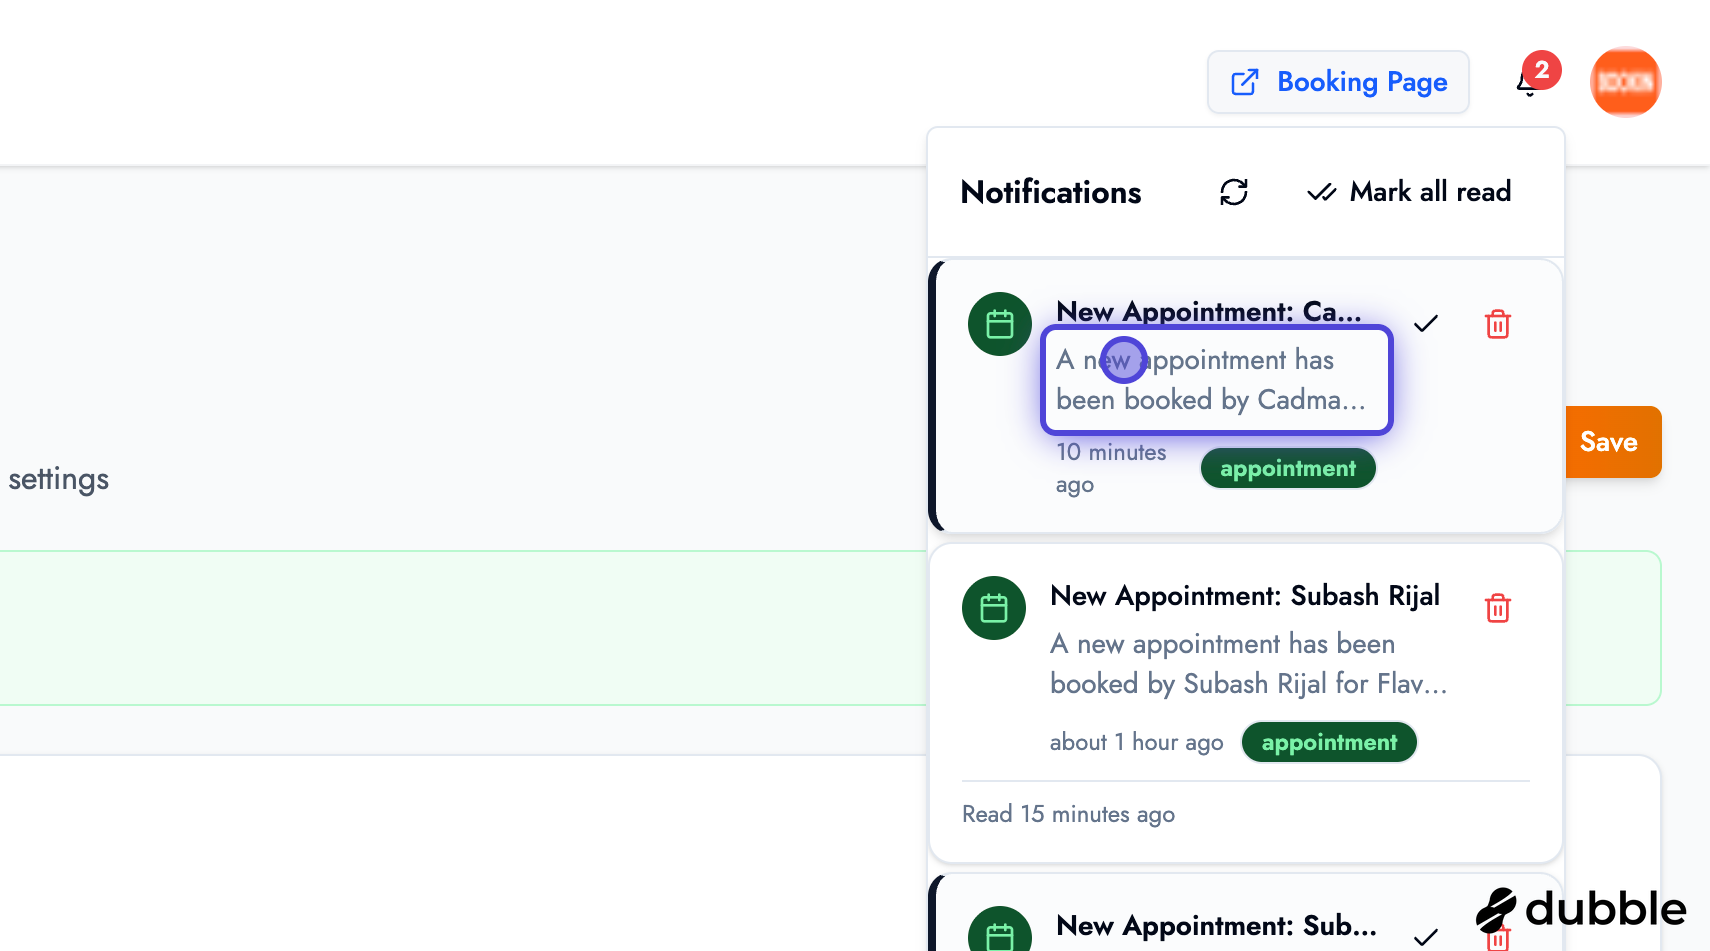
Additional business configuration options:
- Booking Policies: Set cancellation and refund policies
- Payment Settings: Configure payment methods and processing
- Location Settings: Set timezone and location details
- Additional Options: Other business-specific settings
Security Settings
Section titled “Security Settings”Protect your account with strong security measures.

Password Management
Section titled “Password Management”- Change Password: Update your account password
- Password Requirements: Ensure your password meets security standards
- Social Login: If you logged in via social login, you can set a password here
Two-Factor Authentication (2FA)
Section titled “Two-Factor Authentication (2FA)”
Enable 2FA for enhanced account security:
- Navigate to Security Settings
- Click “Enable 2FA”
- Follow the setup instructions:
- Scan QR code with authenticator app
- Enter verification code
- Save backup codes
- Your account will be protected with two-factor authentication
Additional Security Options
Section titled “Additional Security Options”- Passkeys: Set up passwordless authentication with passkeys
- Active Sessions: View and manage active login sessions
- Account Deletion: Delete your account if needed (use with caution)
Security Best Practices
- Use a strong, unique password
- Enable 2FA for additional security
- Regularly review active sessions
- Never share your login credentials
Notification Settings
Section titled “Notification Settings”Configure how and when you receive notifications.
Notification Preferences
Section titled “Notification Preferences”Customize your notification preferences:
- System Notifications: Platform updates and system messages
- Appointment Notifications: New bookings, cancellations, reminders
- Marketing Notifications: Promotional content and updates
- Email Preferences: Choose which notifications to receive via email
- In-App Notifications: Configure in-platform notification settings
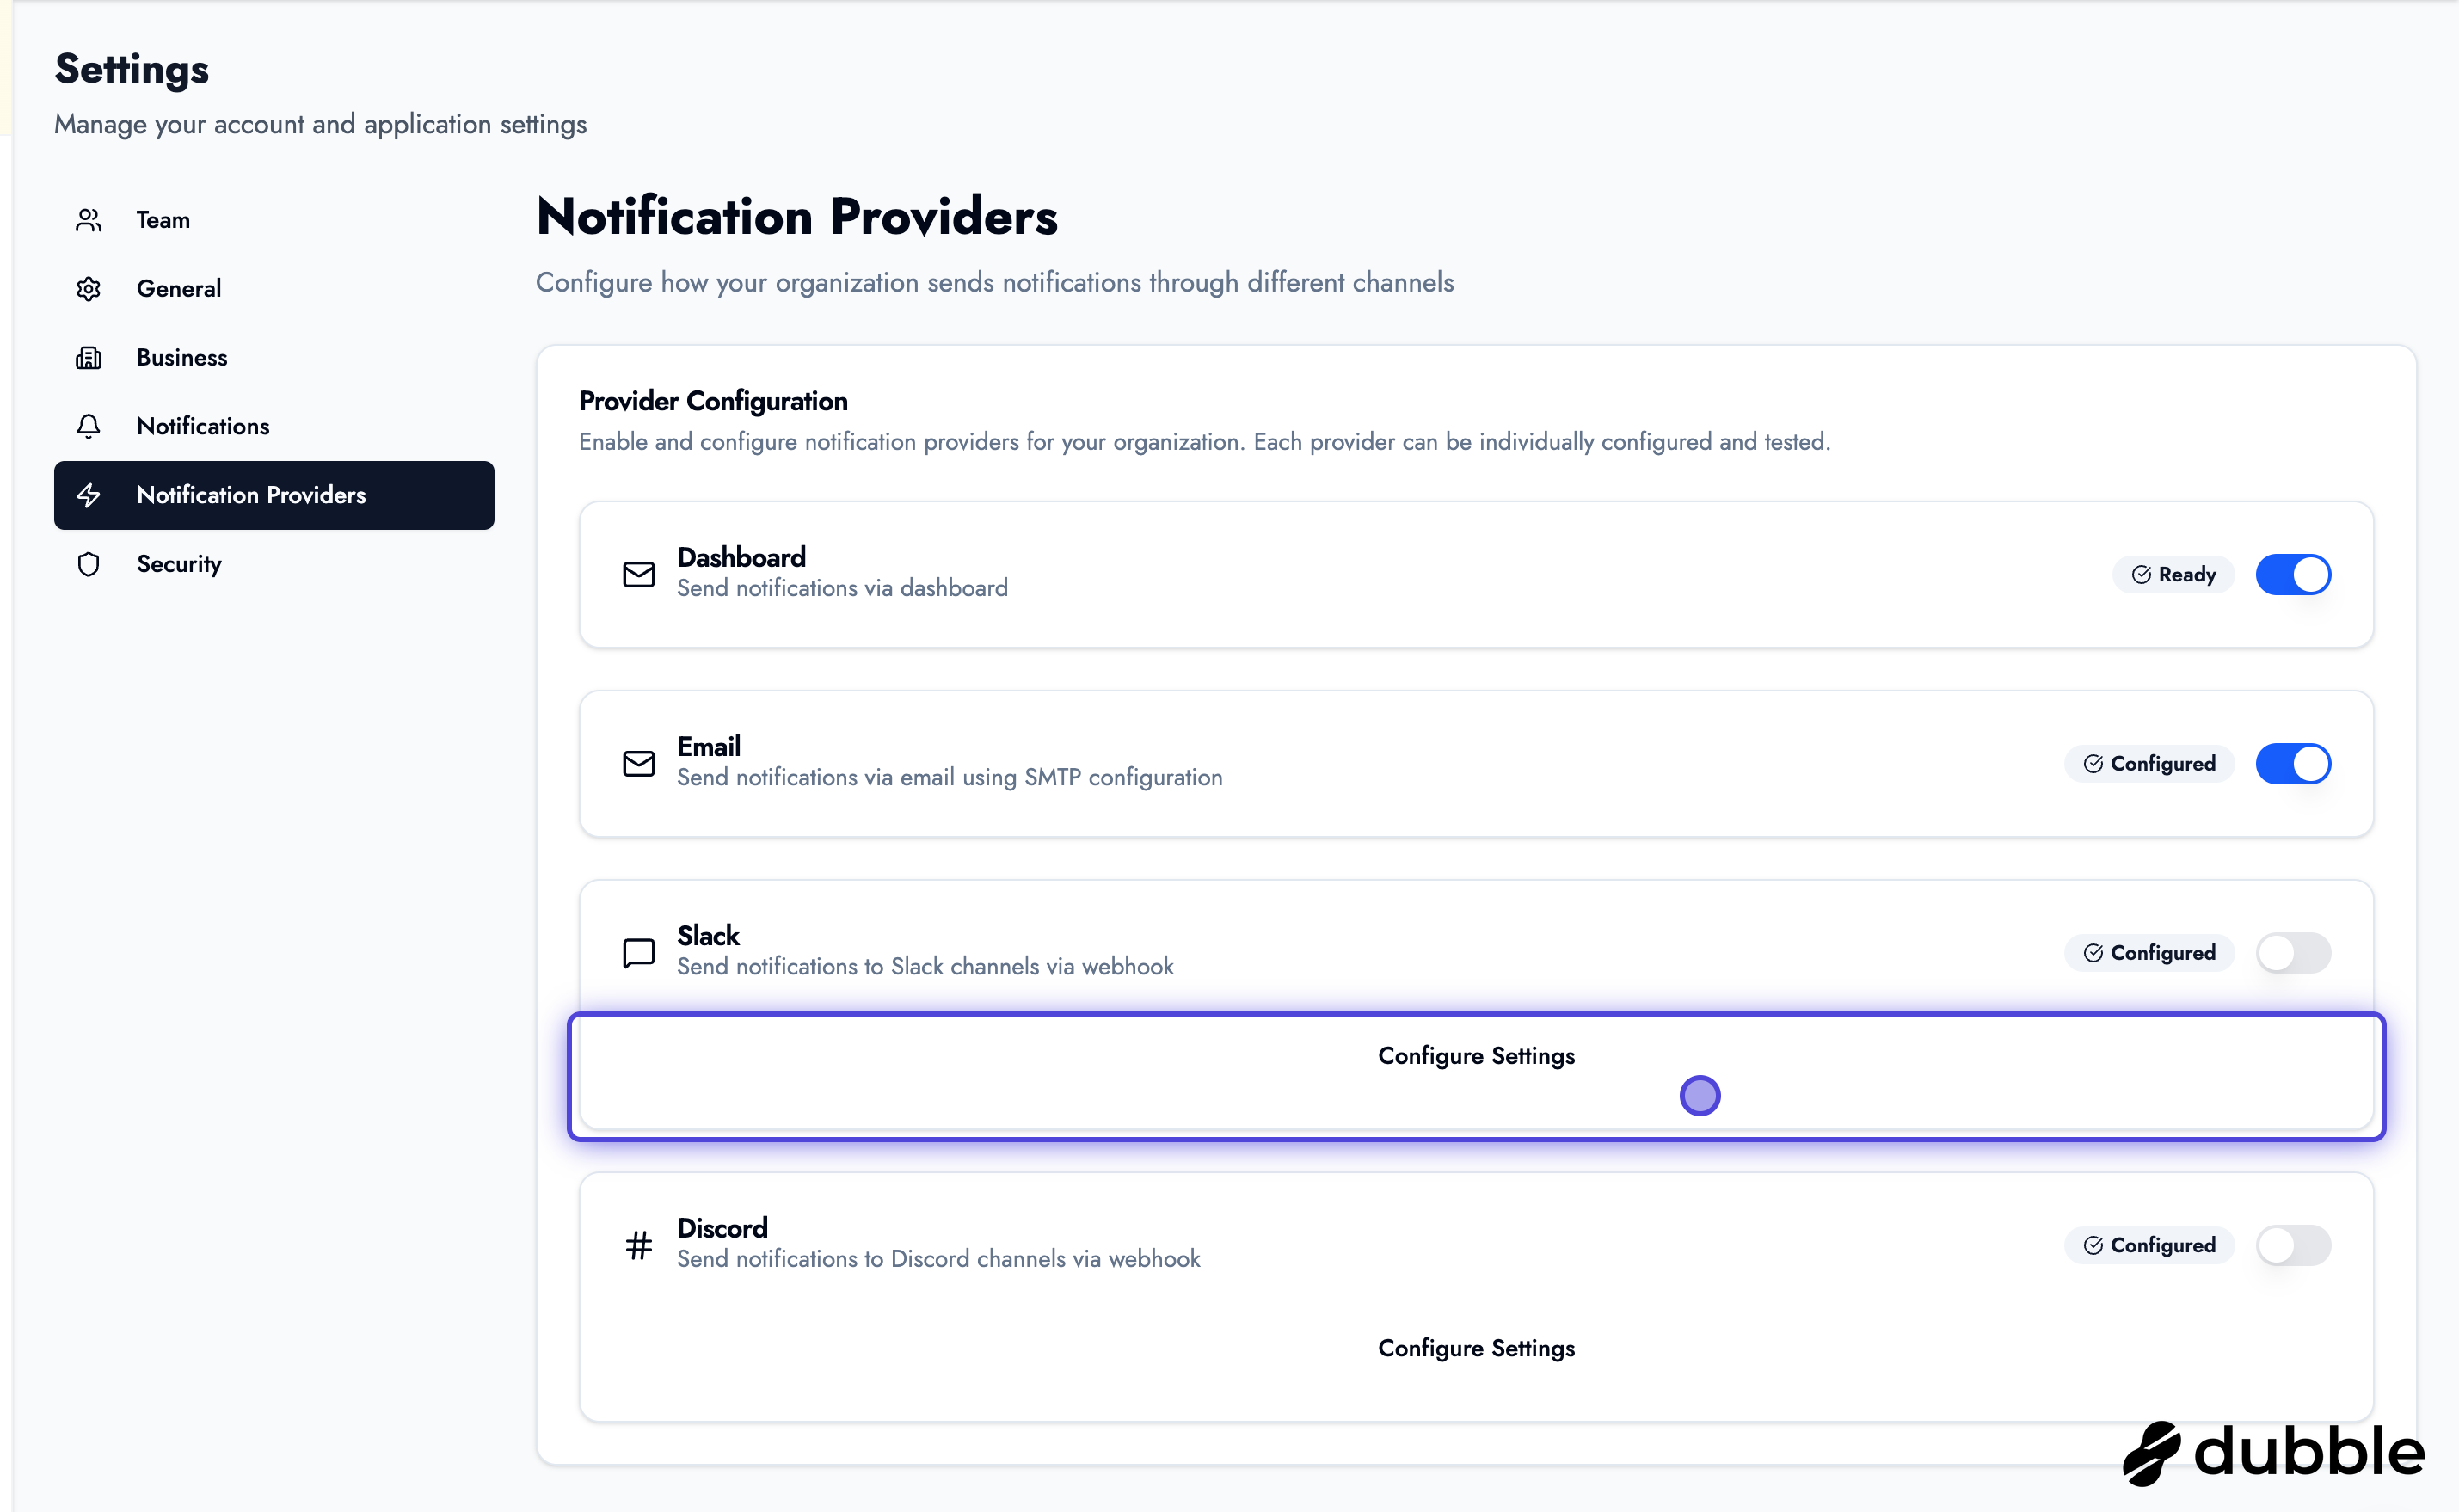
Notification Providers
Section titled “Notification Providers”
Set up different notification channels:
Available Providers:
- Email: Standard email notifications
- Slack: Receive notifications in your Slack workspace
- Discord: Get notifications in Discord channels
- SMS: Text message notifications (if available)
- Other Integrations: Additional notification providers
Configuration:
- Navigate to Notification Providers settings
- Select a provider (e.g., Slack, Discord)
- Follow the setup instructions
- Enable or disable specific notification types
- Test the integration to ensure it’s working
Managing Notifications
Section titled “Managing Notifications”
Access notifications from the top right of your dashboard:
- Notification Bell: Click to view all notifications
- Unread Count: See how many unread notifications you have
- Quick Actions: Click notifications to navigate to relevant pages
- Mark as Read: Clear notifications you’ve reviewed
Team Settings
Section titled “Team Settings”Manage your team members and collaborate effectively.
Team Management
Section titled “Team Management”View Team Members:
- See all team members with their roles
- View team member activity and permissions
- Manage team member access levels
Invite New Members:
- Click “Invite Member” or “Add Team Member”
- Enter the member’s email address
- Assign a role (Admin, Staff, etc.)
- Send the invitation
- The member will receive an email to join your team
Team Roles
Section titled “Team Roles”Different roles have different permissions:
- Owner/Admin: Full access to all features
- Staff: Limited access to bookings and customers
- Viewer: Read-only access
Booking Page URL
Section titled “Booking Page URL”Your public booking page URL is displayed in the top right of your dashboard:
- Share with Customers: Use this URL to share your booking page
- QR Code: Generate a QR code for easy access
- Embed Widget: Get embeddable code for your website
Best Practices
Section titled “Best Practices”Settings Configuration Tips
Section titled “Settings Configuration Tips”- Complete Your Profile: Fill out all business information for professionalism
- Upload Branding: Add logo and cover image for brand recognition
- Enable Security: Set up 2FA and strong passwords
- Configure Notifications: Set up notification channels you’ll actually use
- Regular Updates: Keep your business information current
- Team Management: Only invite trusted team members
Business Profile Optimization
Section titled “Business Profile Optimization”- Professional Description: Write a compelling business description
- High-Quality Images: Use professional logo and cover images
- Complete Contact Info: Make it easy for customers to reach you
- Clear Policies: Set transparent booking and cancellation policies
Security Recommendations
Section titled “Security Recommendations”- Strong Passwords: Use unique, complex passwords
- 2FA Enabled: Always enable two-factor authentication
- Regular Reviews: Periodically review security settings
- Team Access: Regularly audit team member access
Next Steps
Section titled “Next Steps”After configuring your settings:
- Set up your services - Create services customers can book
- Configure business hours - Set your availability
- Learn about billing - Manage your subscription
Related Guides
Section titled “Related Guides”- Dashboard Overview - Navigate your dashboard
- Managing Services - Set up your service offerings
- Business Hours & Time Slots - Configure availability
- Billing & Pricing - Manage your subscription