
Creating Appointments
Phone bookings, walk-ins, regulars who’d rather text you — this guide covers creating those bookings yourself.
The calendar
Section titled “The calendar”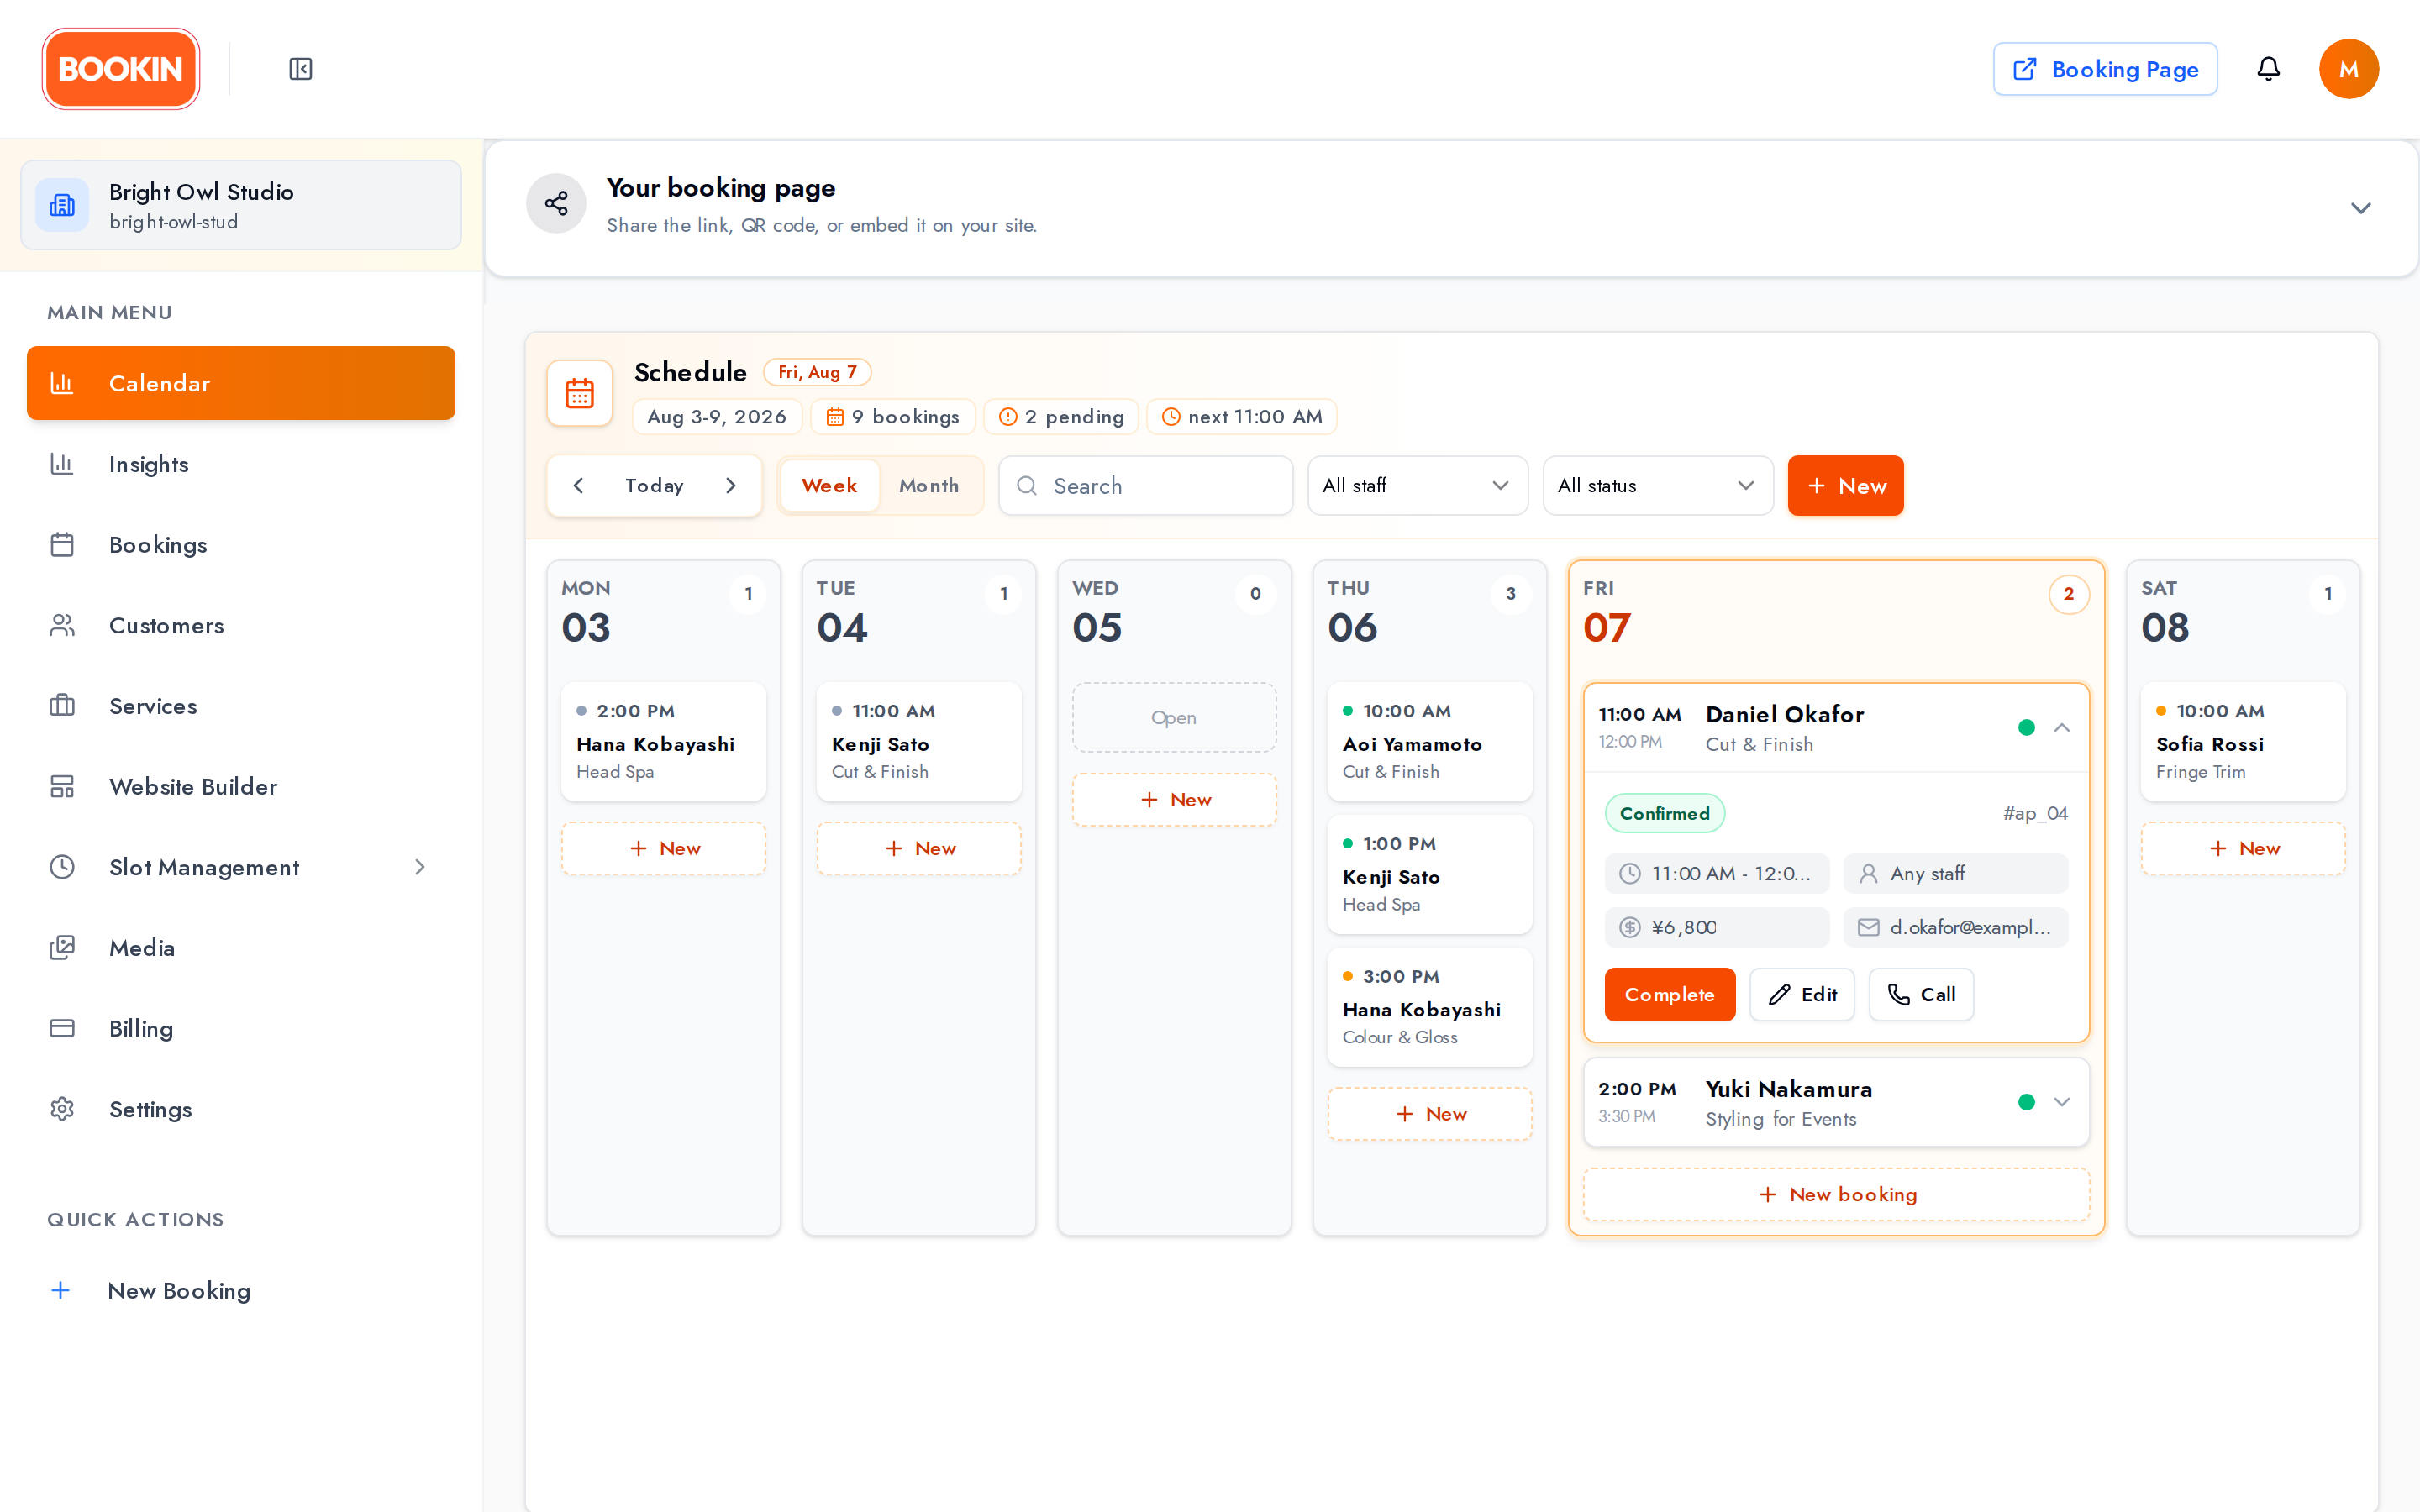
A full-width grid with a control bar across the top: live counts for the period, Prev / Today / Next, search, a staff filter, a status filter, and a New button.
Two views — Week and Month. In Month view, clicking a day opens a drawer with that day’s bookings.
Creating a booking
Section titled “Creating a booking”Click New, or click into the calendar, to open the New Reservation form.
Step 1: Choose the customer
Section titled “Step 1: Choose the customer”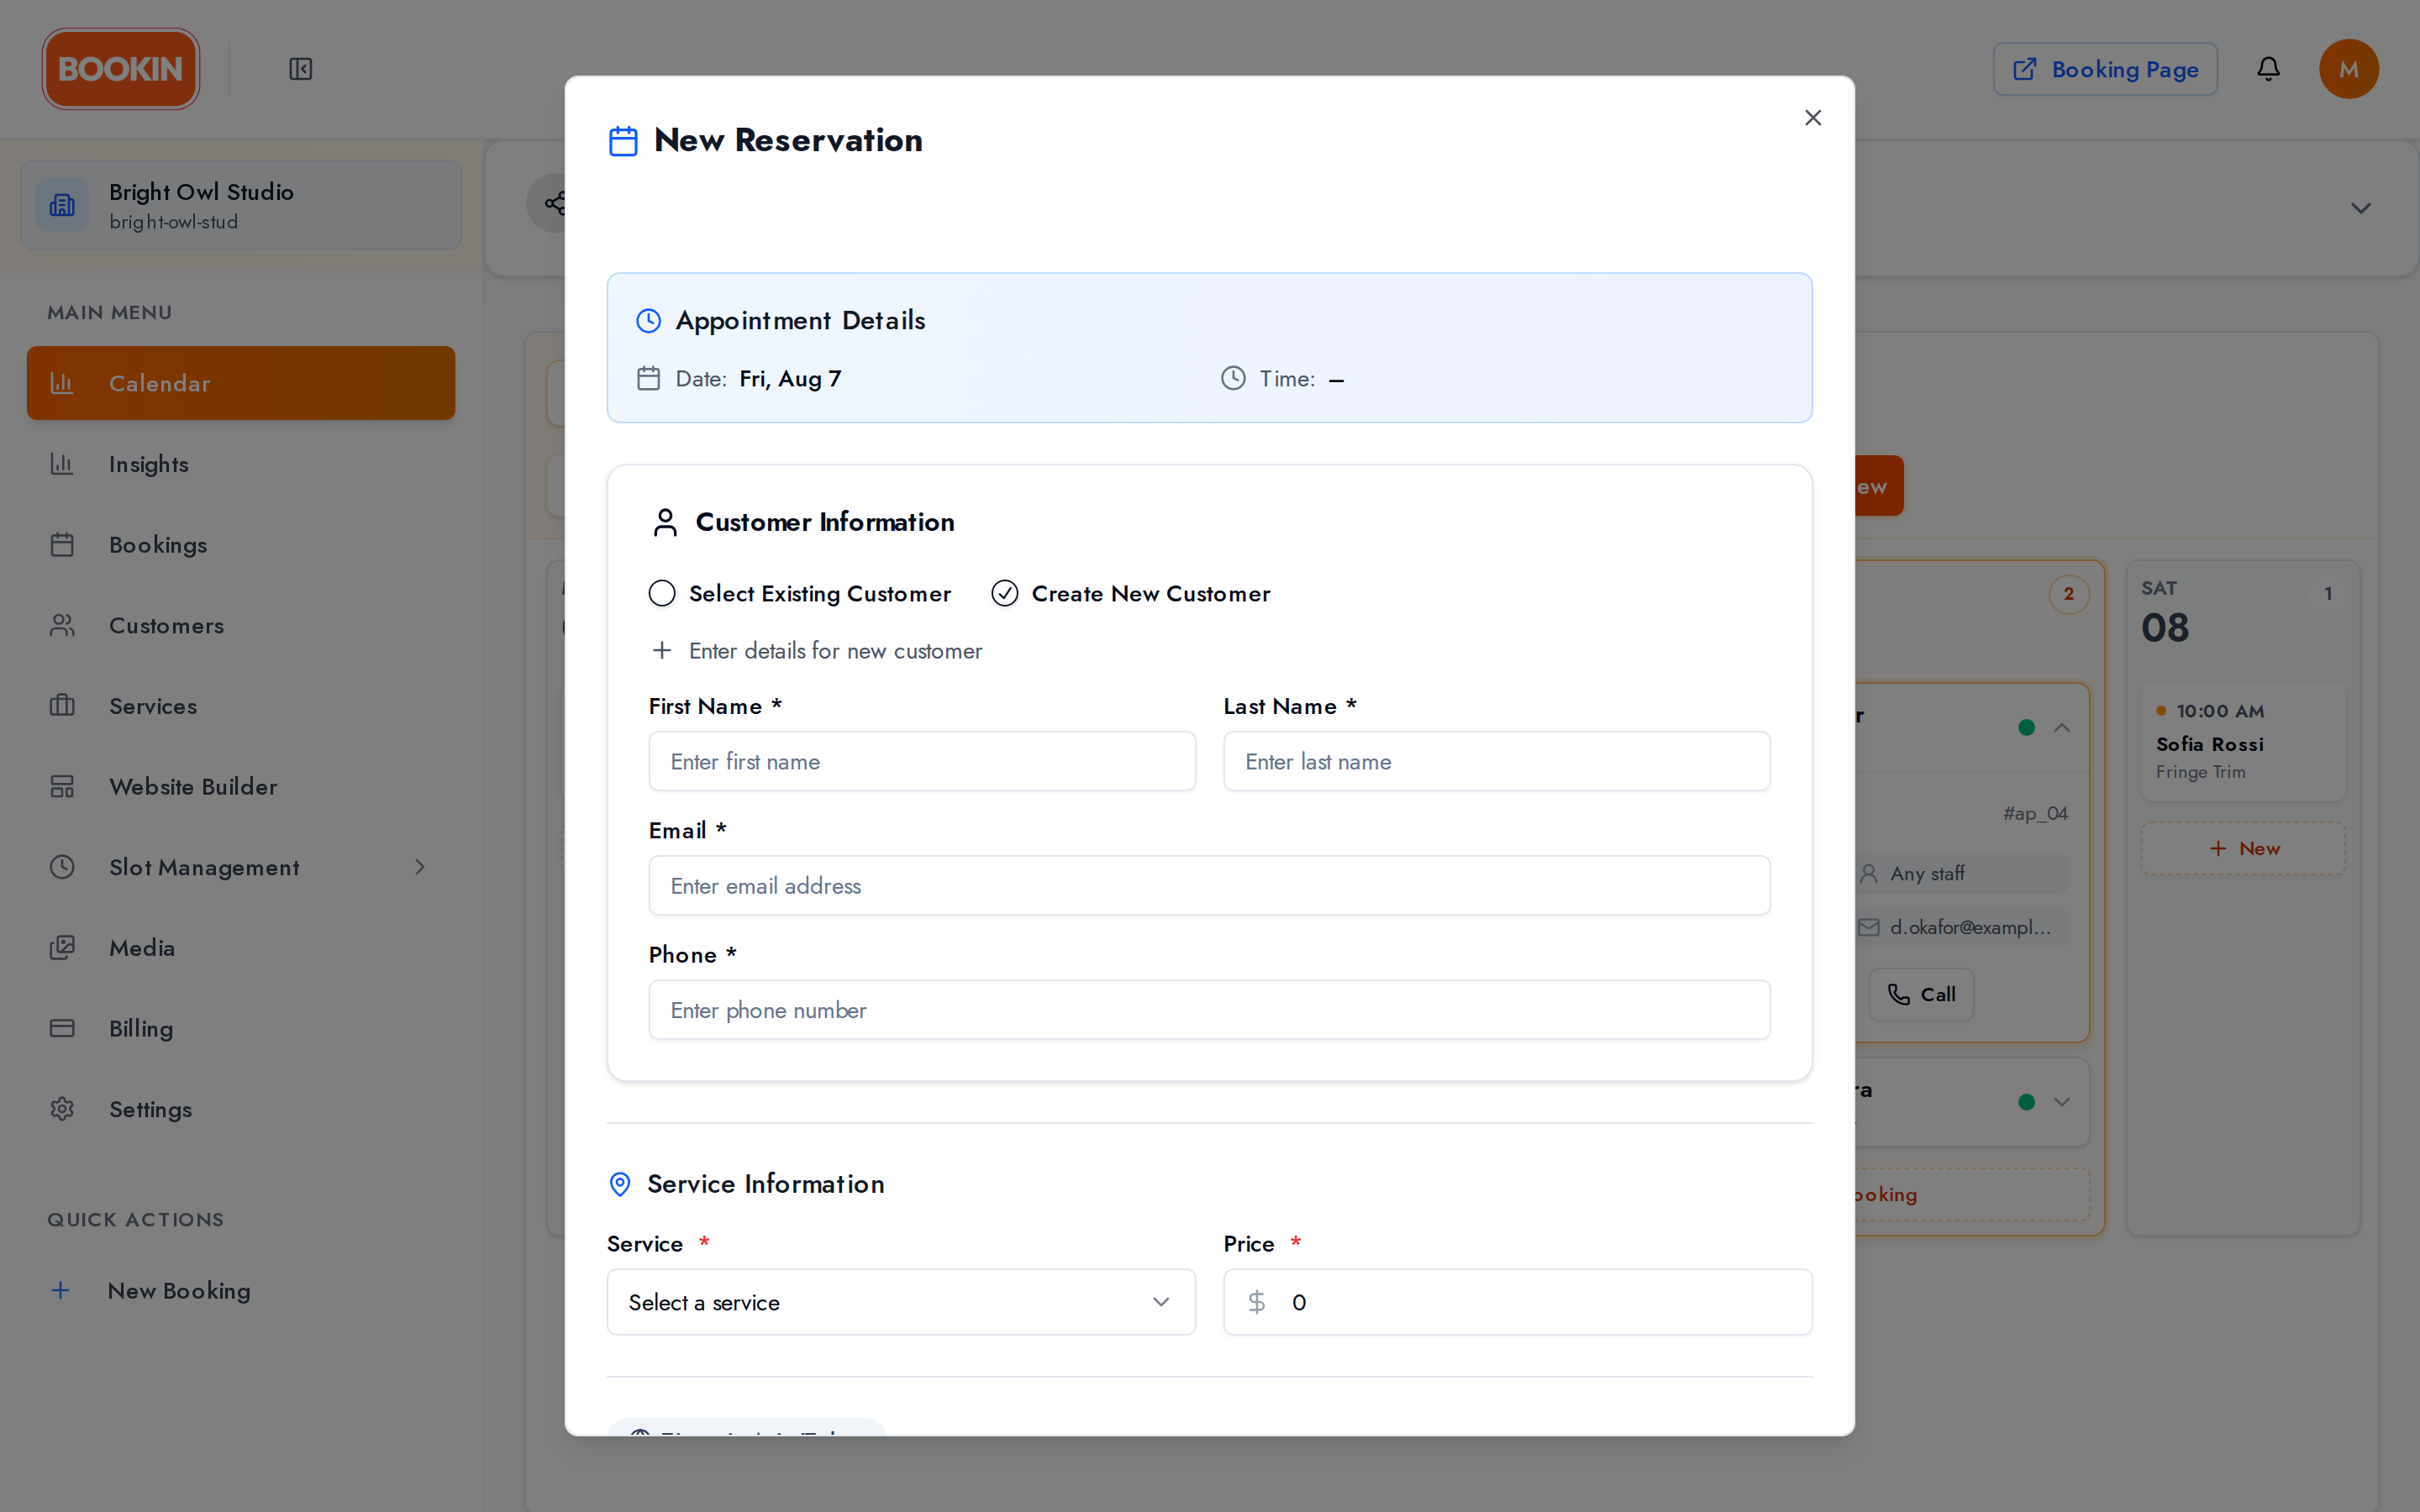
Toggle between Select existing and Create new.
- Select existing — search by name or email and pick from the list.
- Create new — enter their name, email and phone. This is how customers get added to your customer list; there’s no separate “add customer” screen.
Give an email address wherever you can. Without one the customer gets no confirmation, no reminders, and can’t cancel or check status themselves.
Step 2: Choose the service and staff
Section titled “Step 2: Choose the service and staff”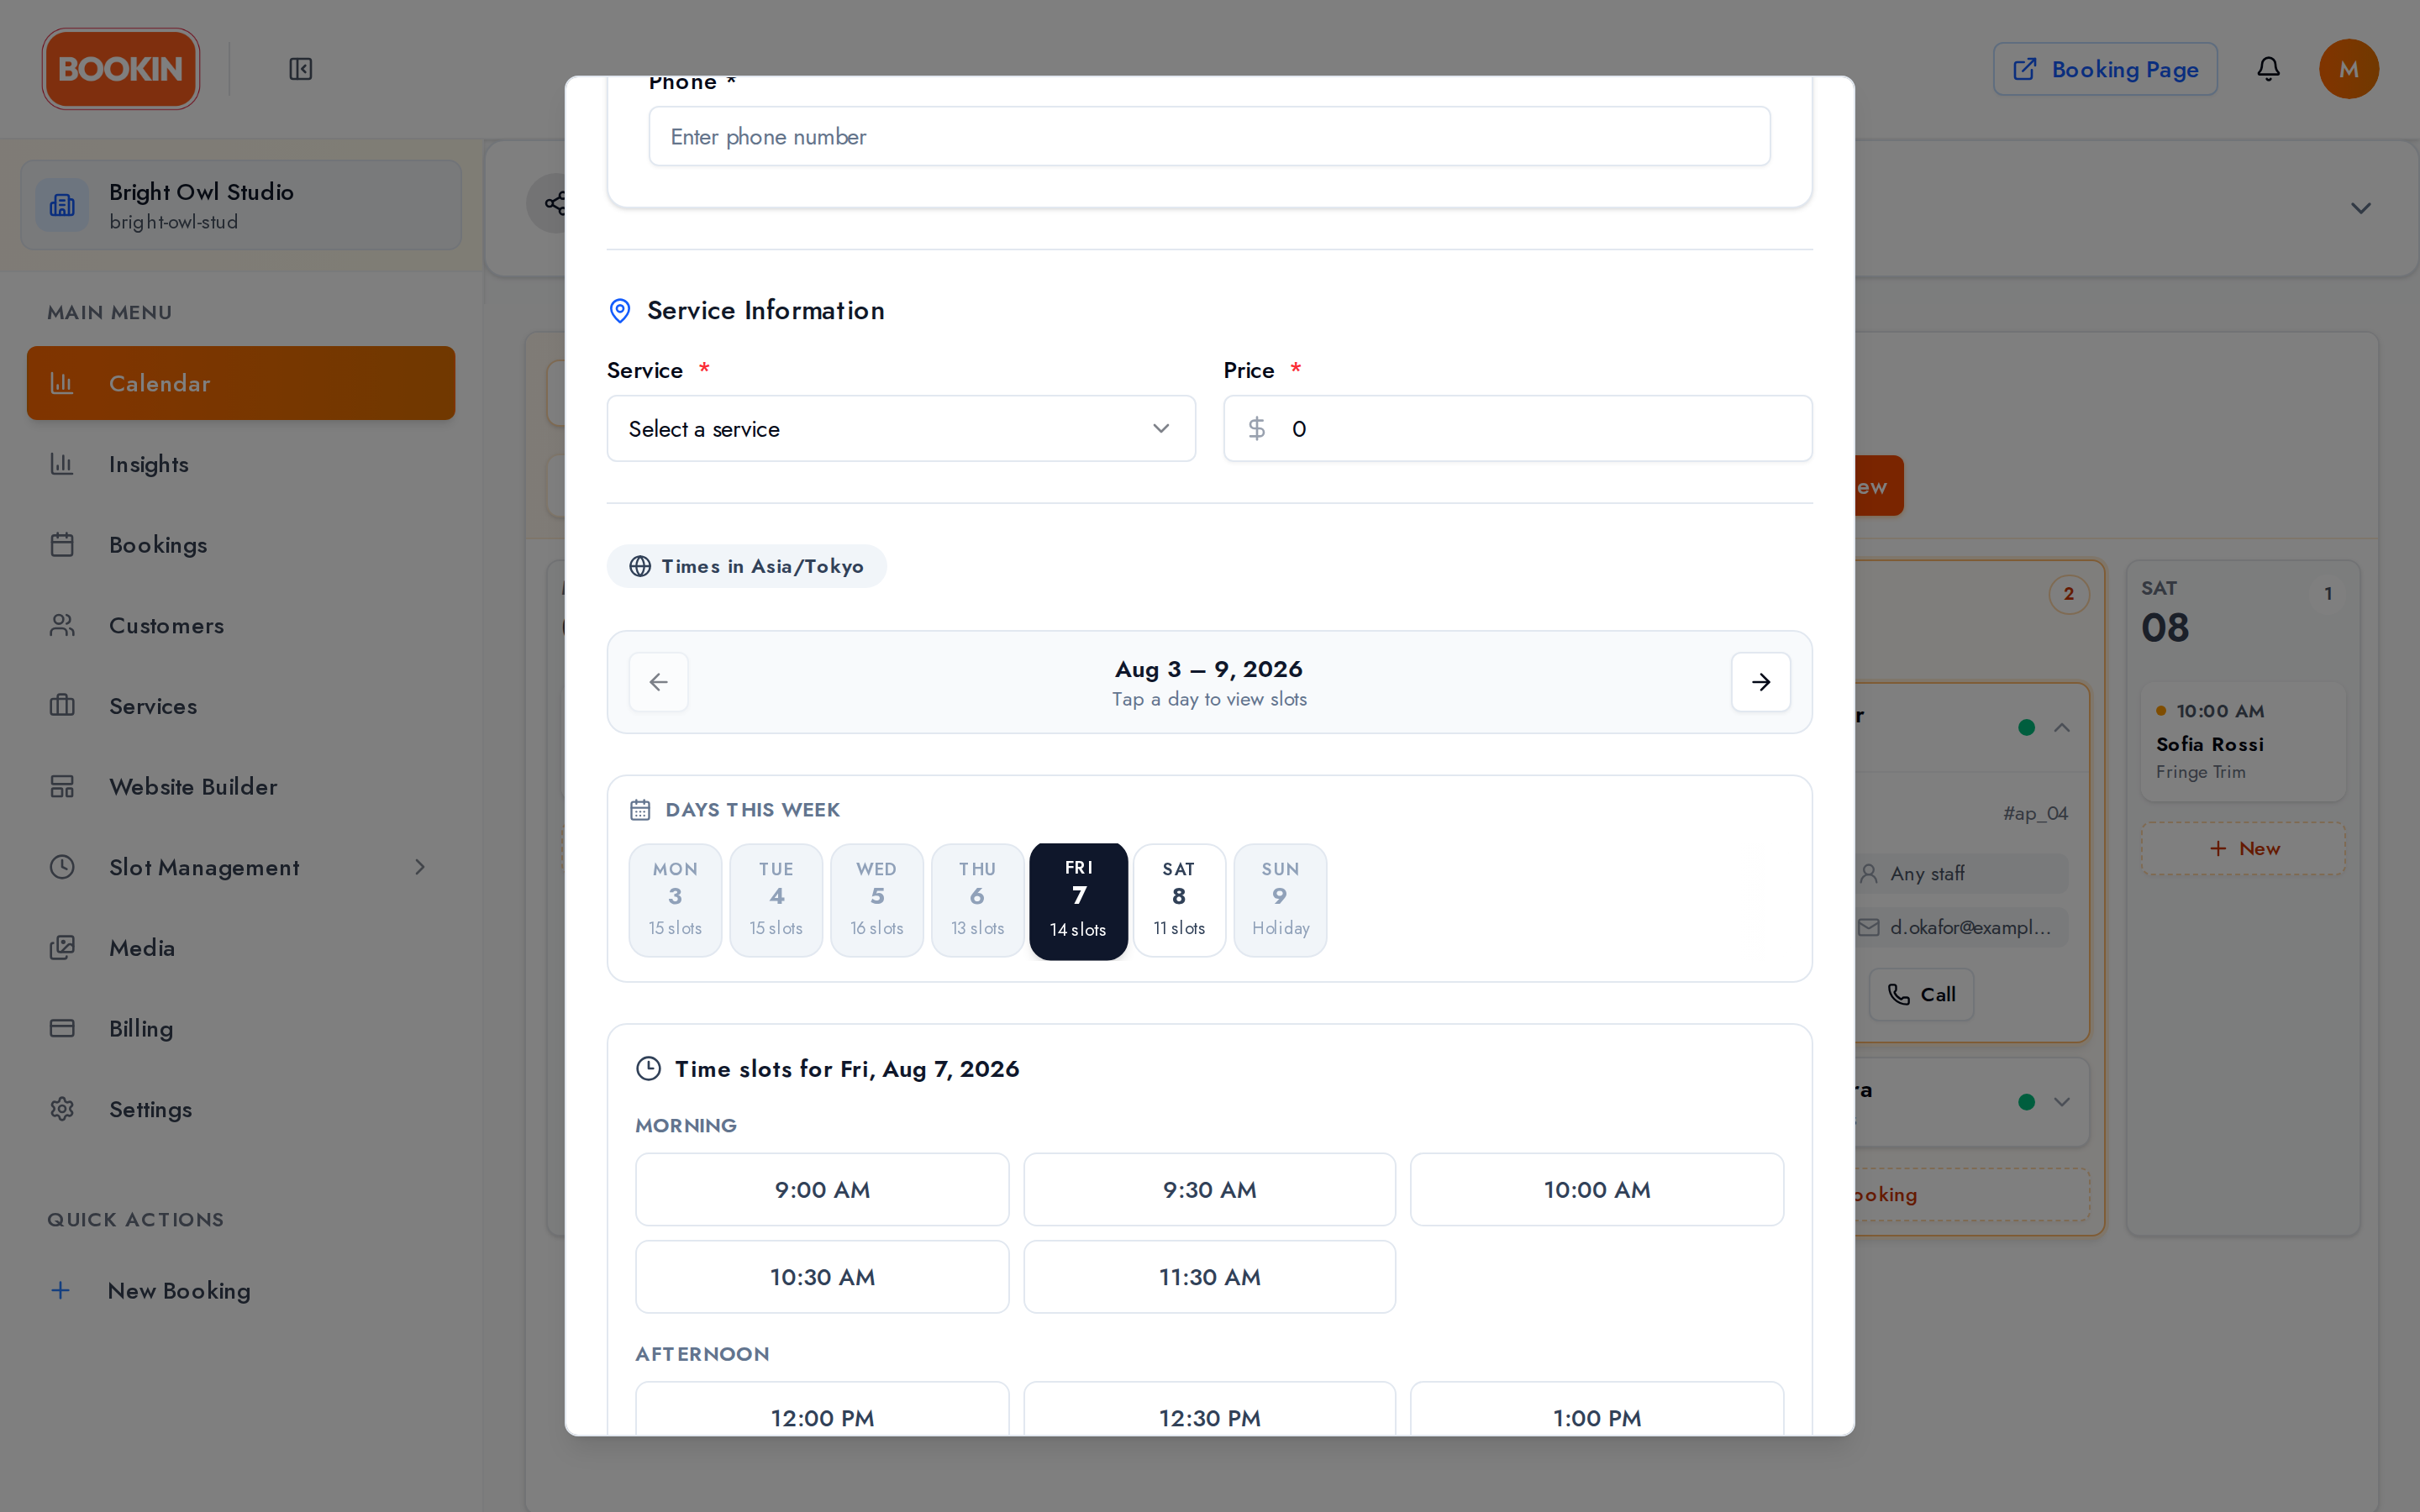
Pick the service, and the staff member who’ll deliver it. The price fills in from the service — override it here for a discount or a special rate.
Step 3: Pick the date and time
Section titled “Step 3: Pick the date and time”You get the same availability picker your customers see on the public booking page, so what you’re looking at is exactly what’s genuinely open. Slots already taken aren’t offered, so you can’t double-book by accident.
Step 4: Notes and requests
Section titled “Step 4: Notes and requests”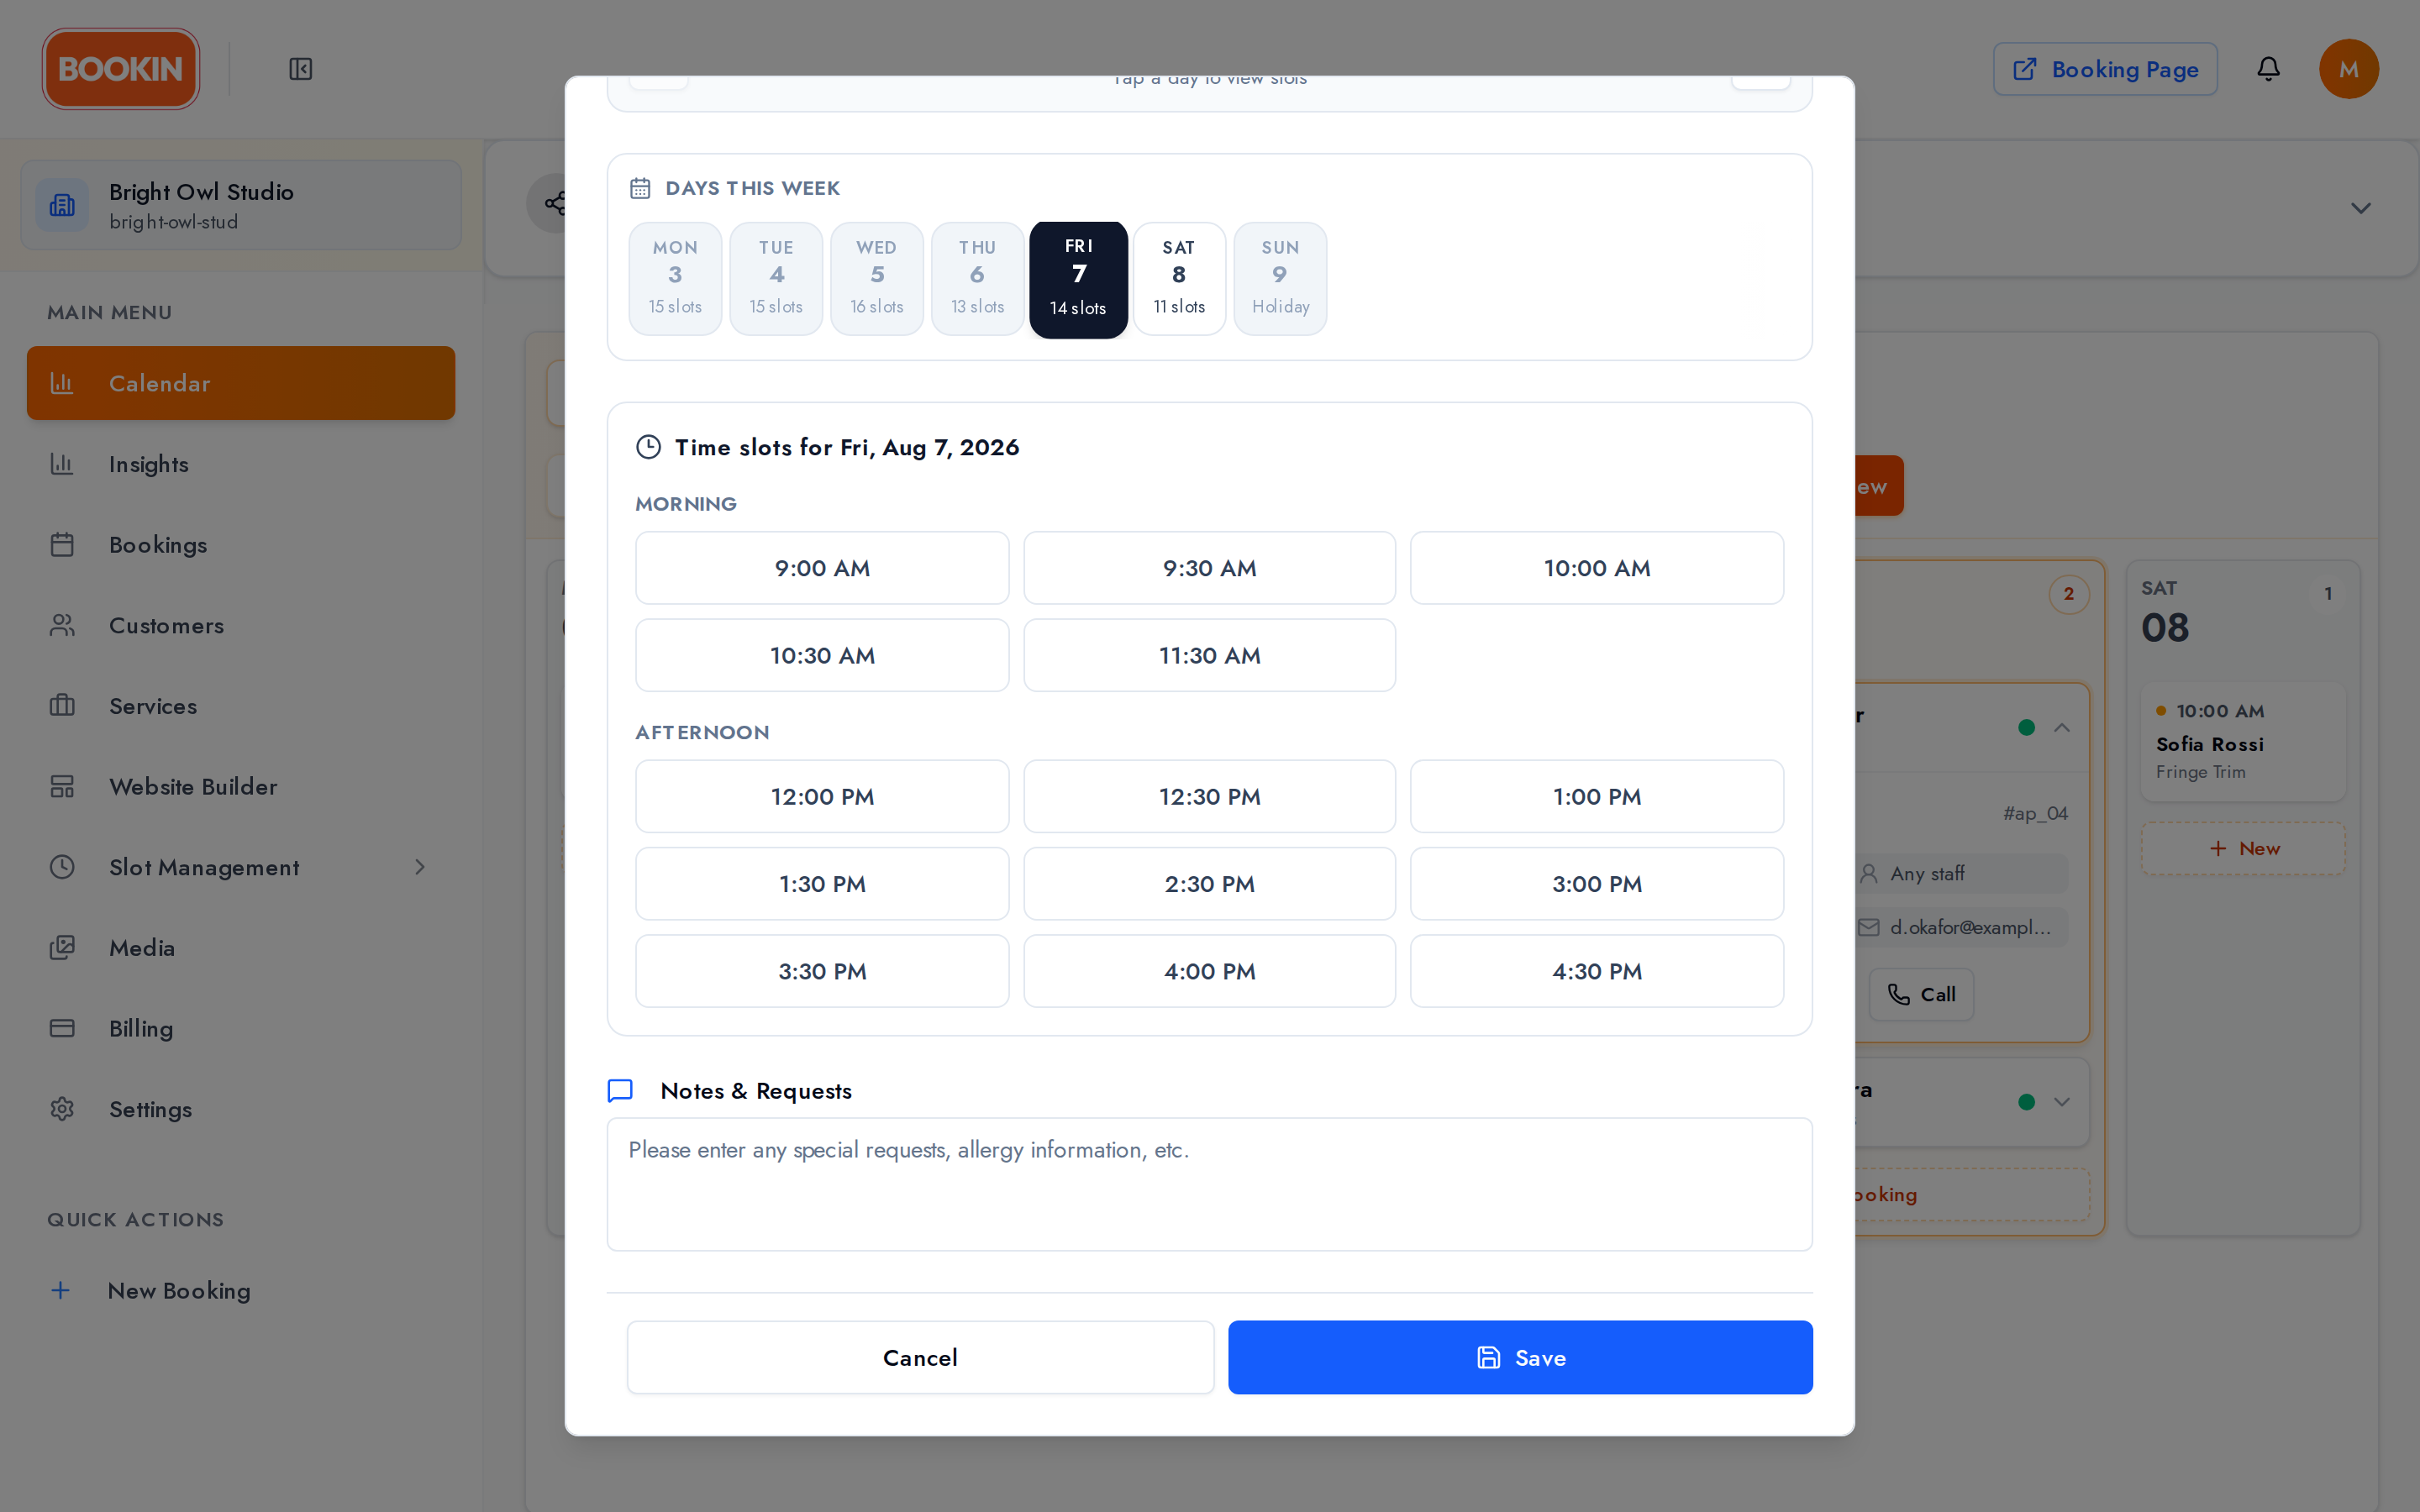
Add anything the appointment needs — preferences, instructions, equipment.
Step 5: Save
Section titled “Step 5: Save”Review and save.
- Get the email right — it drives confirmations, reminders and self-service cancellation.
- Assign staff as you go, so the calendar’s staff filter stays useful.
- Check the price whenever you’ve overridden it.
- Confirm straight away if the booking is already agreed — otherwise it sits pending.
- Watch your monthly booking limit on Free and paid plans alike; bookings you create count toward it.
Next Steps
Section titled “Next Steps”Related Guides
Section titled “Related Guides”- Managing Appointments - Edit, confirm, and manage existing appointments
- Managing Customers - View customer details and booking history
- Dashboard Overview - Navigate the dashboard and view analytics