Dashboard Overview
The dashboard is where you run your booking business. This page shows you what’s where, so the rest of the guides make sense.
Signing in
Section titled “Signing in”- Go to the sign-in page.
- Enter your email and password — or use Continue with Google, or a passkey if you’ve set one up.
- If you have two-factor authentication on, enter your six-digit code.
Every sign-in lands you on the Calendar. That’s the home of the dashboard — there’s no separate overview screen.
Your first few days
Section titled “Your first few days”Until your setup is complete, the Calendar shows a “Finish setting up your business” card tracking four items:
- Complete your business profile
- Confirm your business hours — BOOKIN sets weekday defaults for you, so this is a check rather than a setup
- Confirm your booking slots — 30-minute slots from 9 to 5 by default
- Add a service
Progress shows as “{done}/{total} done”, and you can Dismiss the card at any point.
The reason three of those say “confirm” rather than “create”: when you sign up, BOOKIN builds your organization, business details, booking subdomain and a starting schedule automatically. You’re adjusting defaults, not starting from an empty page.
The sidebar
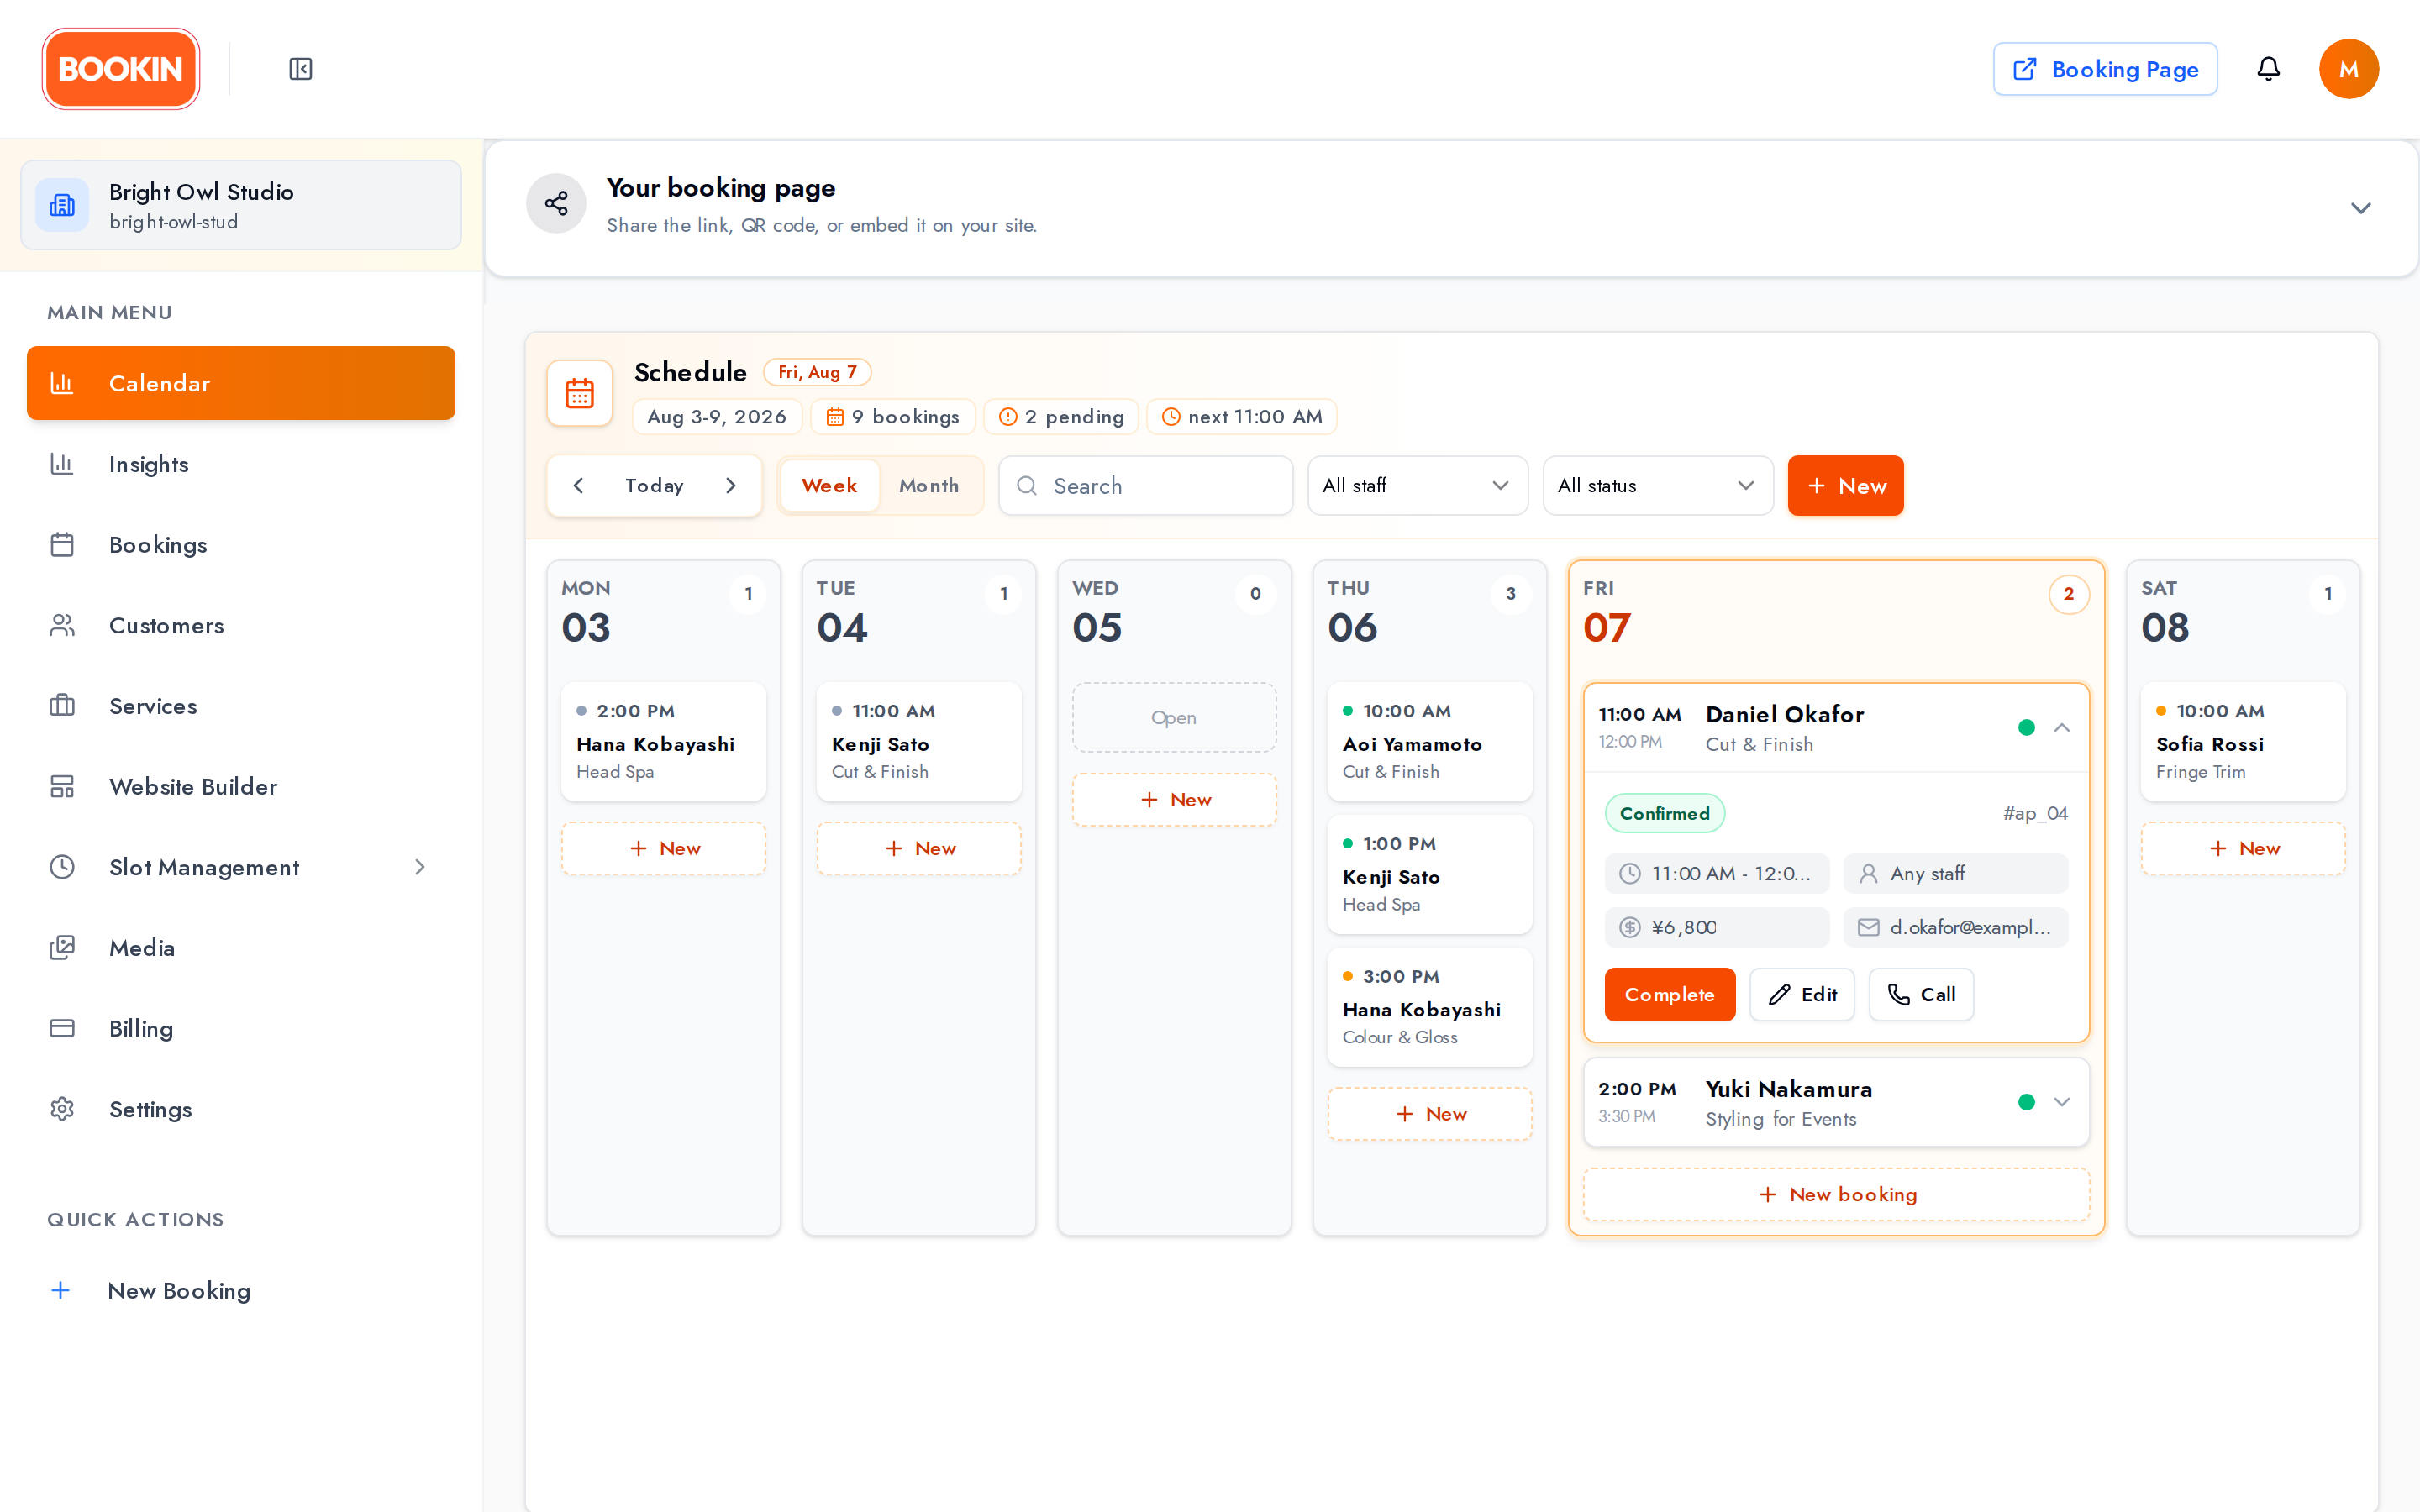
Section titled “The sidebar”| Item | What it’s for |
|---|---|
| Calendar | Your schedule, and where you create bookings |
| Insights | Reports on bookings, revenue, demand and customers |
| Bookings | Every appointment in one searchable list |
| Customers | Your customer database and their history |
| Services | What customers can book, and what it costs |
| Website Builder | Build and publish a website for your business |
| Slot Management | Business Hours, Slot Settings and Overrides |
| Media | Images and files used across your account |
| Billing | Your plan, invoices and payment method |
| Settings | Team, business details, notifications, domains and security |
Below that, Quick Actions has a New Booking button.
If you’re on the Free plan and you’re the owner, a Pro Plan card sits at the bottom of the sidebar with an Upgrade link.
Switching between businesses
Section titled “Switching between businesses”If you’ve been invited to more than one business, a switcher at the top of the sidebar lets you search and jump between them. You can’t create extra organizations yourself — additional ones only arrive by invitation.
The header
Section titled “The header”- The Booking Page button opens your public booking page in a new tab — handy for checking what customers see.
- The notification bell shows unread activity. Open it to read items, mark them as read, or delete them.
- Your avatar menu holds Settings, Plan Management, Billing, Help, and Logout. Help links straight to this documentation site.
Sharing your booking page
Section titled “Sharing your booking page”On the Calendar you’ll find Your booking page — “Share the link, QR code, or embed it on your site.” Two tabs:
- Link & QR — Open booking page, Copy link, and a QR code customers can scan. Print it, put it on a receipt, stick it in a window.
- Embed — Copy embed code for a snippet that drops your booking flow straight into your own website.
Where the numbers live
Section titled “Where the numbers live”Reports live on Insights, not on the Calendar: booking counts, completed value, completion and cancellation rates, your busiest and quietest days, peak times, top services, and how many customers come back.
Insights is a Pro feature. On Free and Starter the page still opens, showing a blurred preview of each report and an upgrade prompt — so if the numbers look hidden rather than missing, that’s why.
Next Steps
Section titled “Next Steps”- Learn how to create appointments
- Explore calendar management
- Set up your services
- Configure your business hours
Related Guides
Section titled “Related Guides”- Creating Appointments - Step-by-step guide to creating new appointments
- Managing Appointments - Learn how to view, edit, and manage existing appointments
- Managing Services - Set up and manage your service offerings
- Billing & Pricing - Plans, limits, and what each one includes