Managing Appointments
Managing Appointments
Section titled “Managing Appointments”This guide covers running appointments day to day — finding them, changing their status, editing them, and cancelling when you have to.
Two places to work
Section titled “Two places to work”The Calendar is the visual view — good for seeing your day or week take shape, and for spotting gaps.
The Bookings page is the list — good for finding a specific booking, or working through everything with a given status.
The Calendar
Section titled “The Calendar”The calendar has Week and Month views.
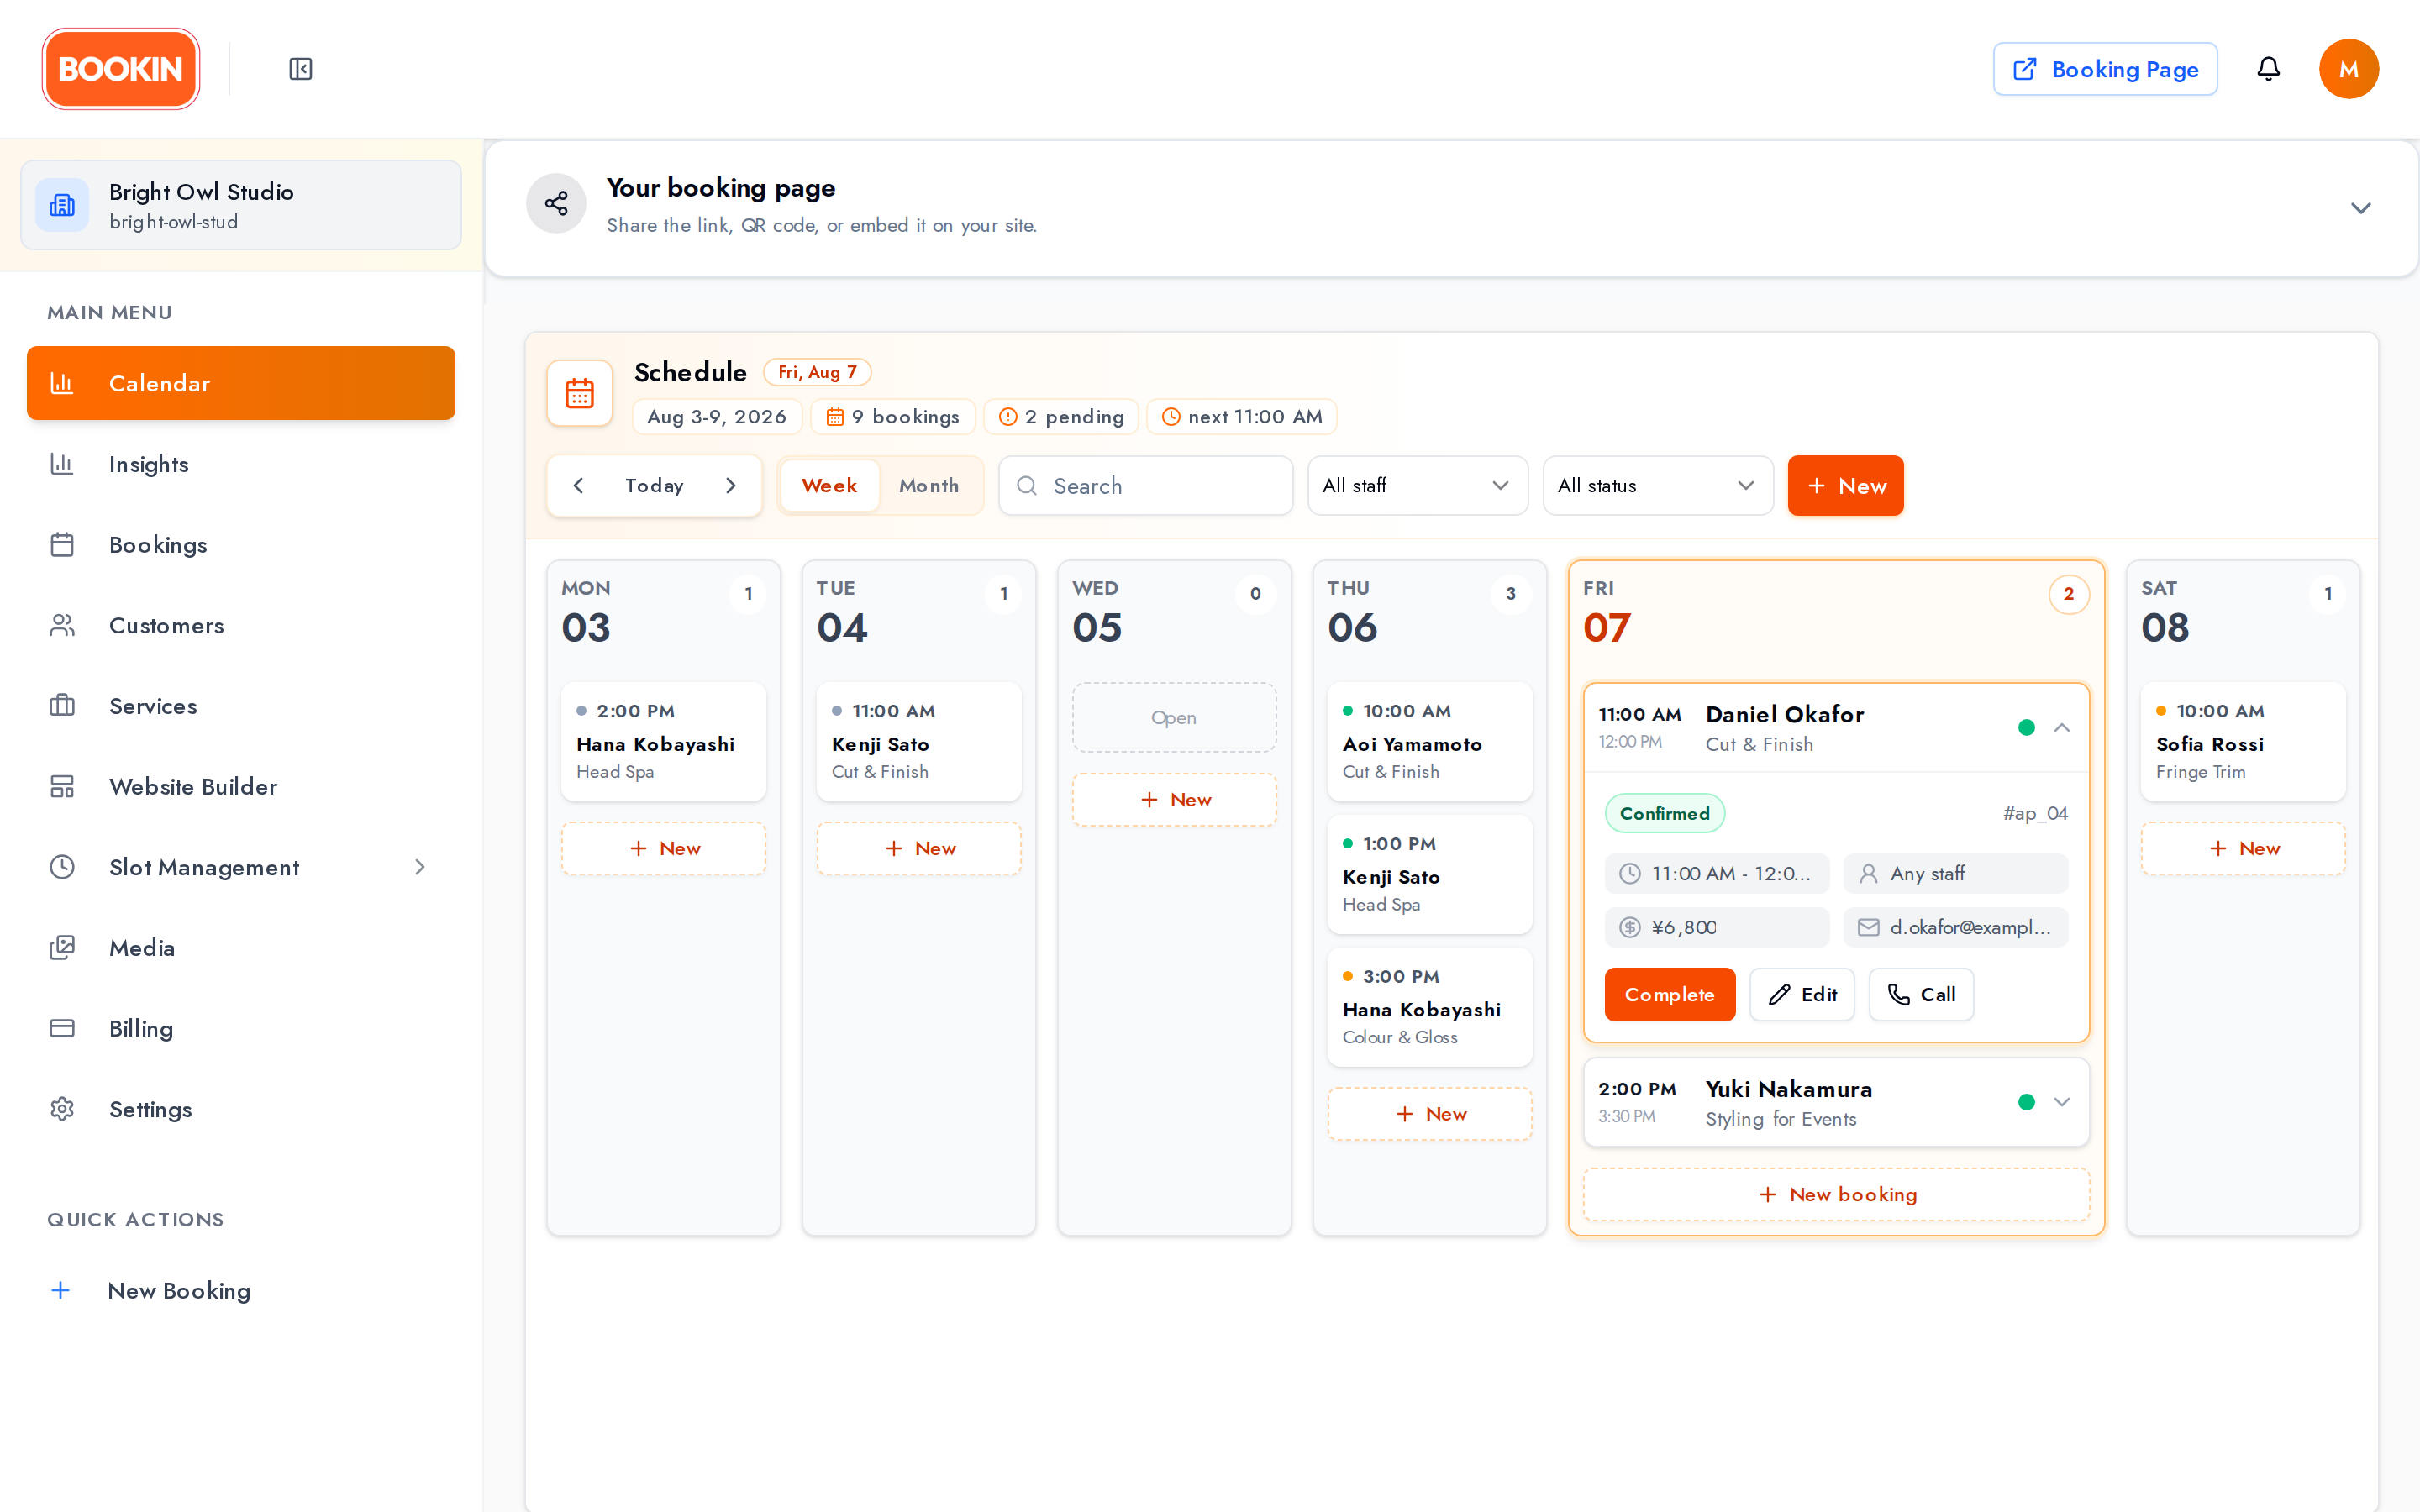
In Month view, clicking a day opens a drawer with that day’s bookings in detail — that’s how you drill into a single date.
The top bar
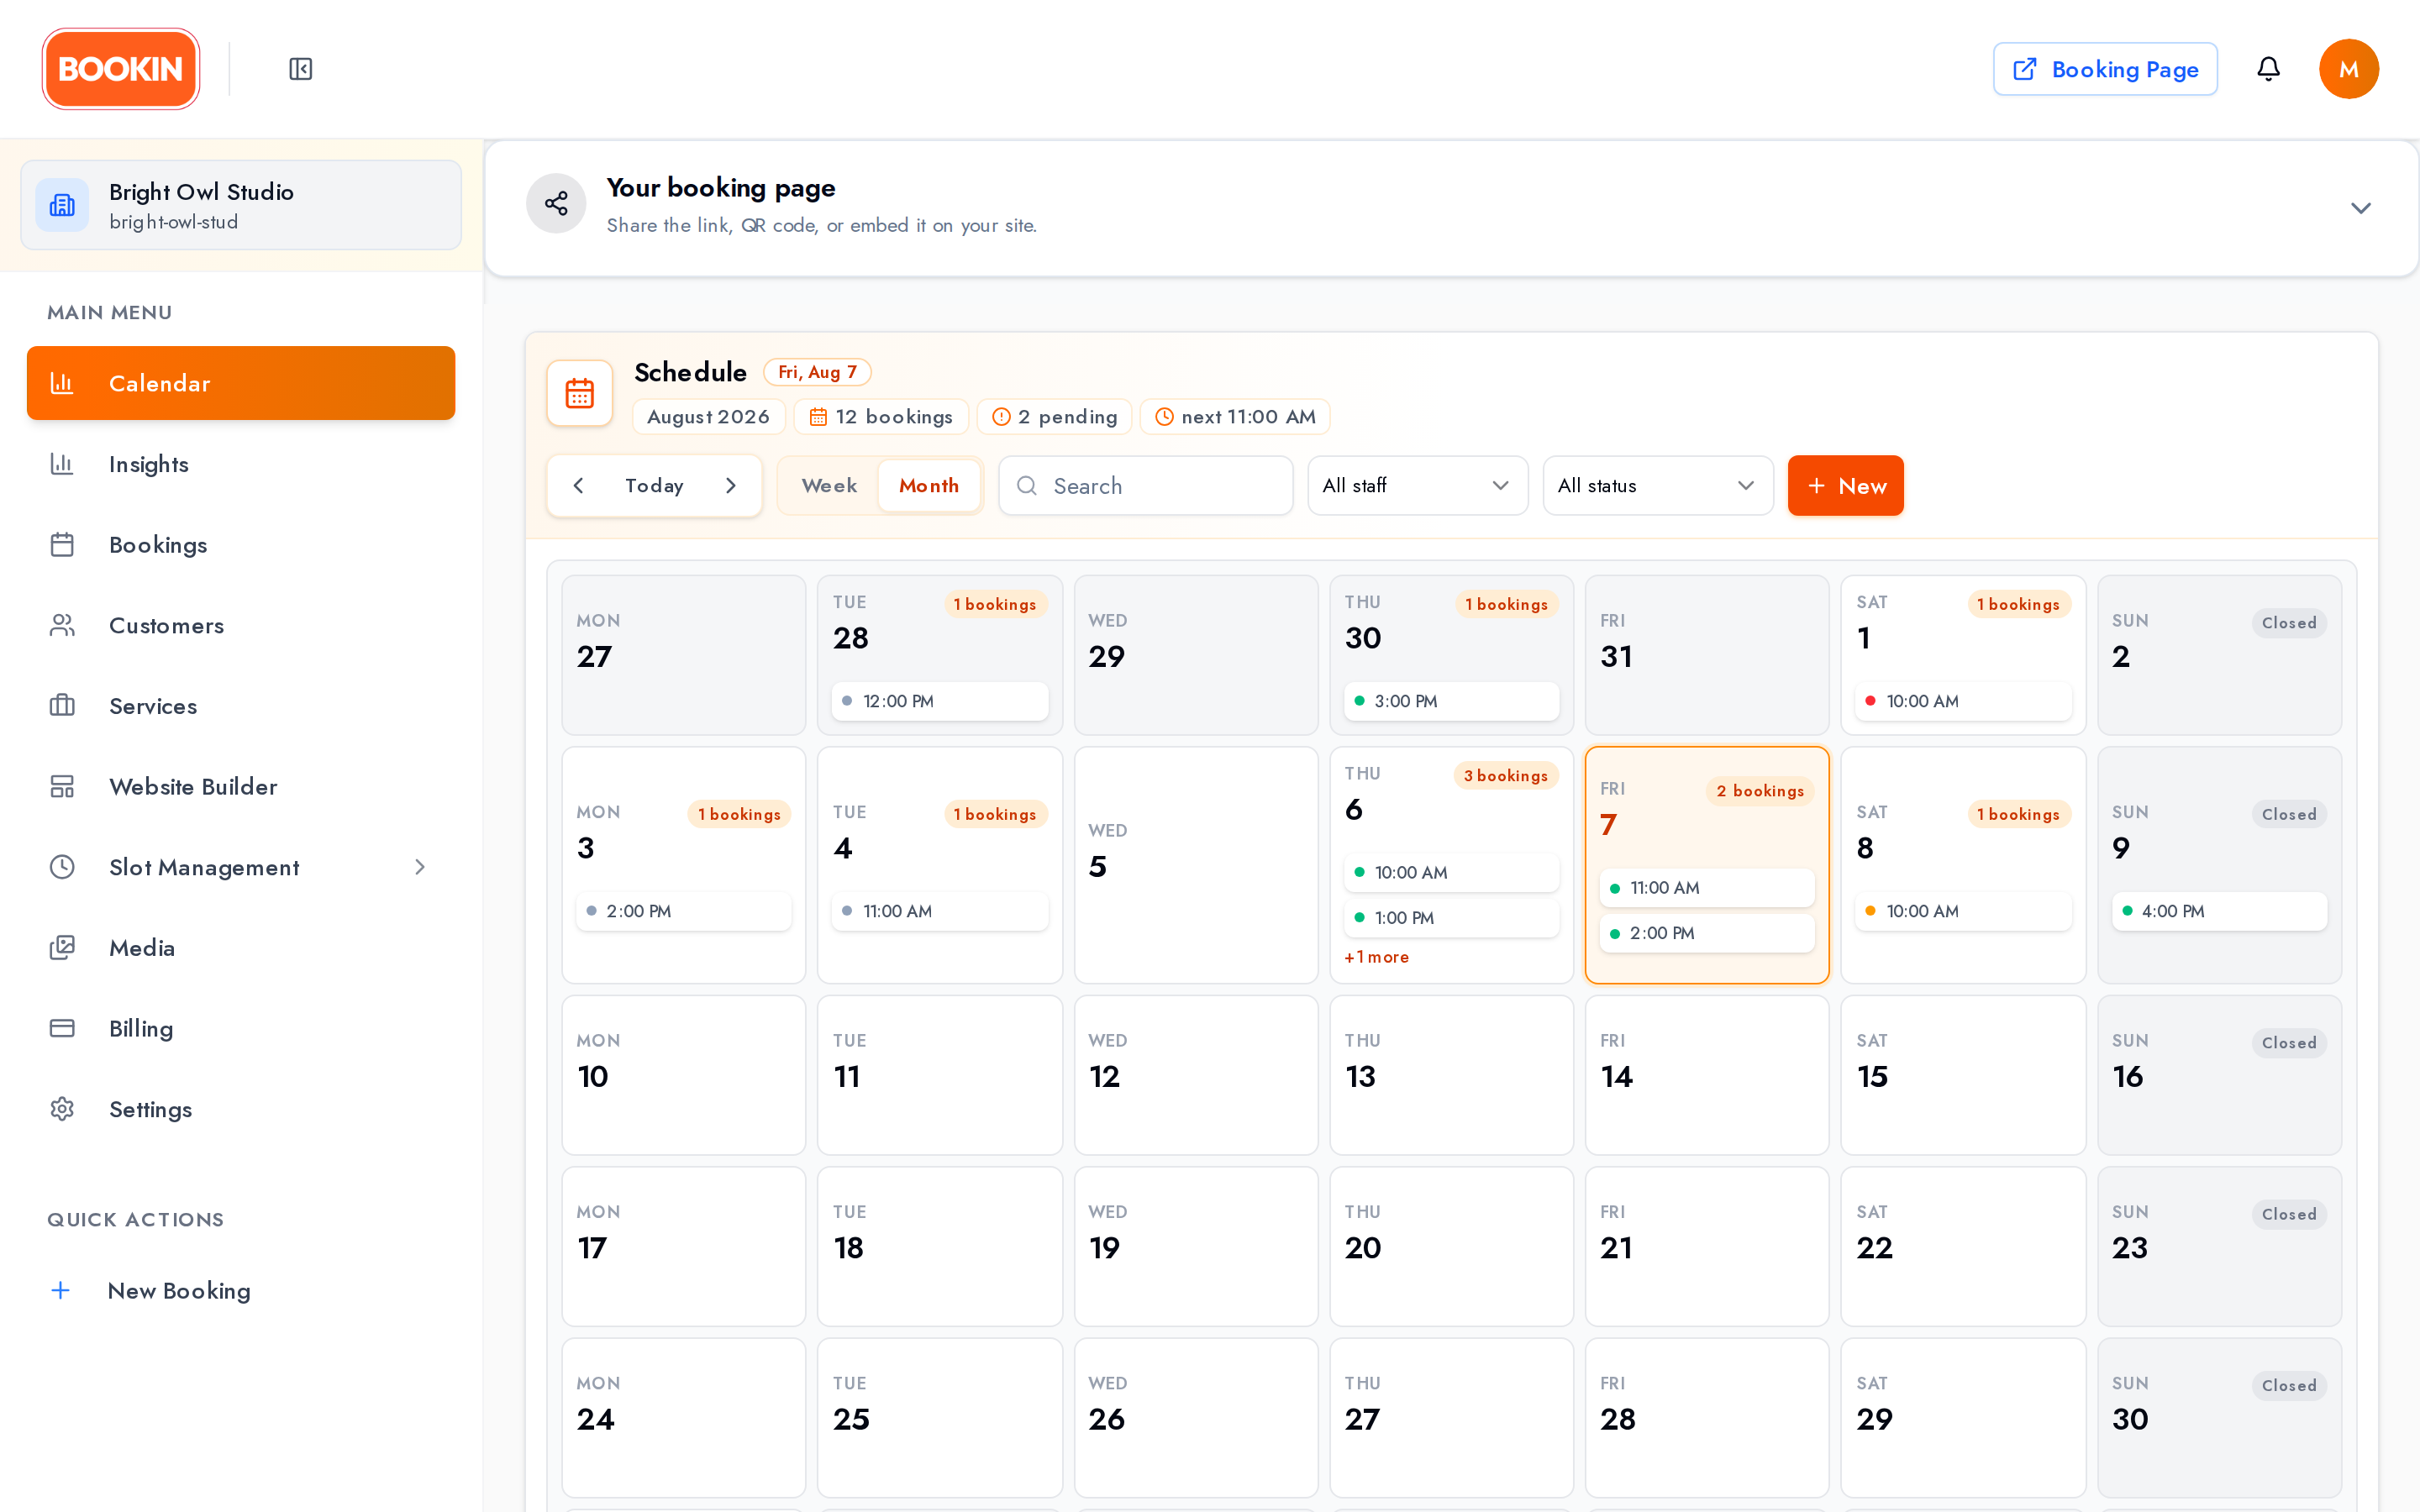
Section titled “The top bar”Across the top you get live counts for the period you’re looking at — how many bookings, how many still pending, and when the next one starts (or Closed if you’re not open).
Alongside those:
- Prev / Today / Next to move around
- Search across customer, service, staff and time
- All staff to focus on one person’s schedule
- All status to filter by Pending, Confirmed, Completed or Cancelled
- New to create a booking
Acting on a booking from the calendar
Section titled “Acting on a booking from the calendar”Click an appointment to expand it.
You’ll see the customer, service, time, status, price, booking code and any notes — plus one-click actions:
- Confirm — accept a pending booking
- Complete — mark it done after the appointment
- Edit — change the details
- Call — dial the customer directly from their number
Where a booking has no staff assigned or no email on file, you’ll see Any staff or No email rather than a blank.
The Bookings page
Section titled “The Bookings page”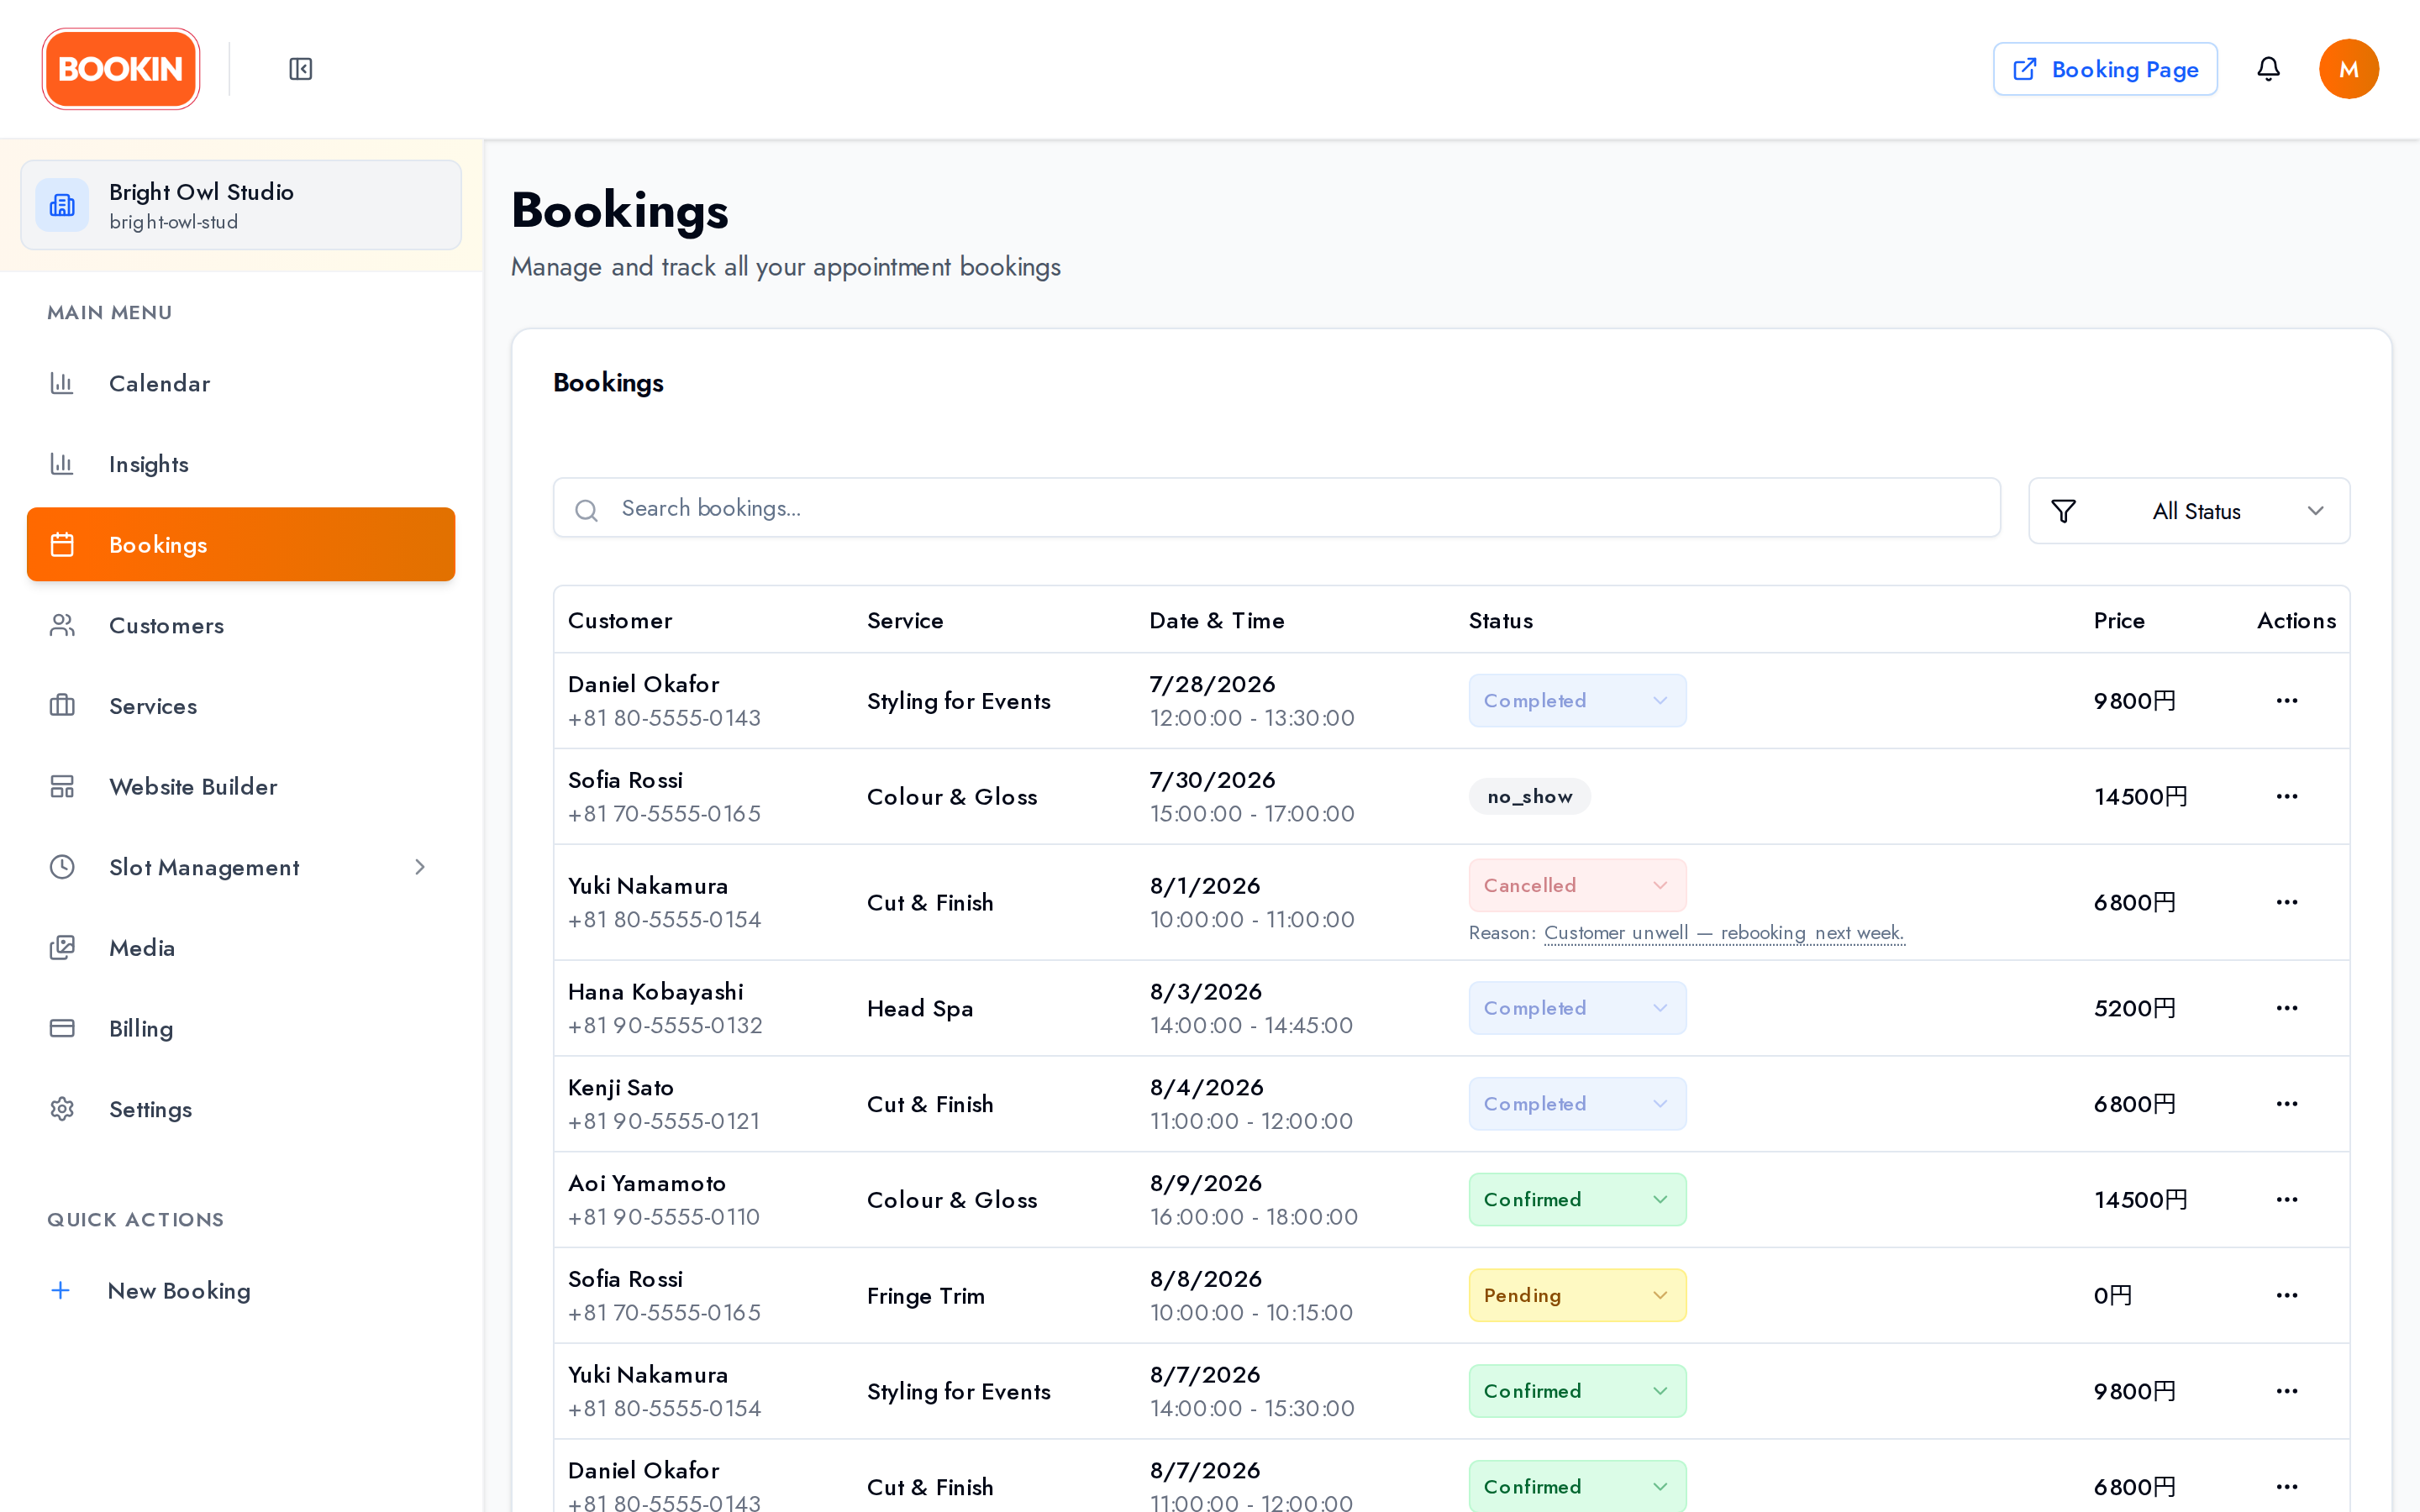
A paginated table, 25 rows at a time, with columns for Customer (name and phone), Service (service and staff), Date & Time, Status, Price and Actions.
Finding a booking
Section titled “Finding a booking”- Search matches customer name, phone and service name — all in one box.
- Status filters to Confirmed, Pending, Cancelled or Completed.
Your search and filter live in the page URL, so you can bookmark a view or share it with a colleague.
Changing status from the list
Section titled “Changing status from the list”If your role allows managing bookings, the Status cell is a dropdown — change it right there, no need to open the booking. Otherwise you’ll see the status as a read-only badge.
Deleting
Section titled “Deleting”The row actions include Delete, which removes the booking record entirely. This is different from cancelling: cancelling keeps the record and tells the customer; deleting removes it. You’ll be asked to confirm.
Statuses
Section titled “Statuses”| Status | Meaning |
|---|---|
| Pending | The customer has requested this; you haven’t confirmed yet |
| Confirmed | You’ve accepted it and the customer is expecting service |
| Completed | The service was provided |
| Cancelled | Cancelled, by you or by the customer |
| No Show | The customer didn’t turn up |
No Show is worth using rather than cancelling: it’s shown to the customer on their booking status page, it stops reminder emails going out, and it feeds your no-show rate in Insights.
Customers can cancel their own confirmed bookings from the booking status page, so cancellations won’t always be yours.
Editing an appointment
Section titled “Editing an appointment”- Open the appointment from the calendar or the bookings list.
- Click Edit.
- Change the customer details, service, staff member, date and time, price, or notes.
- Save.
Cancelling
Section titled “Cancelling”- Find the appointment and choose Cancel appointment.
- Enter a cancellation reason.
- Confirm.
The reason isn’t just for your records — it’s included in the customer’s cancellation email, and it shows as a “Reason” preview on the cancelled row in your bookings list. Write it as something the customer should read.
The freed time slot becomes available for other bookings.
Best Practices
Section titled “Best Practices”- Review daily — check the calendar each morning.
- Confirm early — pending bookings are unconfirmed in the customer’s mind too.
- Update status promptly — mark completed straight after service, and use No Show honestly; both feed your reports.
- Write cancellation reasons for the customer, since that’s who reads them.
- Use notes to help staff prepare — but see Managing Customers for what customers can and can’t see.
- Watch your cancellation rate in Insights.
Next Steps
Section titled “Next Steps”- Learn about customer management - View customer history and details
- Set up your services - Configure your service offerings
- Configure business hours - Set your availability
Related Guides
Section titled “Related Guides”- Creating Appointments - Step-by-step guide to creating new appointments
- Managing Customers - View customer details and booking history
- Business Hours & Time Slots - Configure when customers can book